Recently, Apple released the third generation of AirPods. It adopts a similar appearance design as AirPods Pro. But it can support up to 30 hours of listening time, which is 6 hours longer than AirPods Pro. Besides that, it also supports MagSafe charging, which means it can be easily attracted to the MagSafe charger.
So, let's take apart this tiny charging case to see what's inside.
1. Appearance

The charging case is slightly smaller than AirPods Pro. The groove can make it easier to open.

The pairing button is in here. Long press to connect.

And the bottom is the Lightning port.

Model: A2566, Apple Inc.,
Rated Capacitor: 345mAh/1.327Wh
Input: 5V⎓1A, Output: 5V⎓1A.

Here are the pogo pins, used to charge the AirPods 3.

The weight of the charging case is about 37.9g (1.34 oz).

Use ChargerLAB POWER-Z KM001C to test, the charging power is about 1.6W.
2. Teardown

Firstly, just pry and open the charging case.

It can be divided into two parts and fixed by clips and glue.

Take a closer look at the charging case.

Those two parts are fixed by glue.

And this is how those two parts are fixed together.

Some magnets are at the bottom of the upper part, used to attract the AirPods and lid.

This is the internal design.

Take out the charging chamber. We can see it connect to PCB through cable.

Here is the QR code.

Next, take out the entire module.

A large-area graphite thermal pad is attached to the inside of the case.

Take a closer look at the Lightning port from inside.

This is the pairing button, and the charging coil is next to it.

Two square magnets are fixed on the inside of the case for MagSafe charging.

Close-up of the magnets.

Close-up of paring button's outside.

Close-up of paring button's inside.

There is a sealing ring on the side, used for dustproof and waterproof.

And that's the structure of the charging case.

The components are connected by BTB connectors, which are reinforced by glue.

The Lightning port is also connected by BTB connectors.

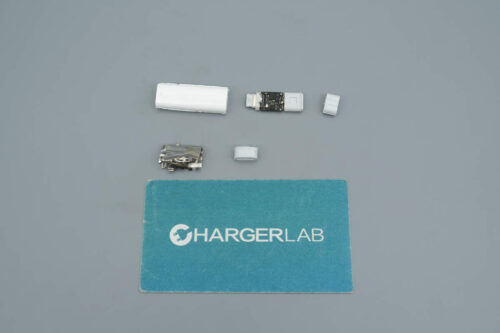
Remove all the BTB connectors, that's all components of the charging case.

The front of the circuit Lightning port.

The back of the circuit Lightning port.

An LED indicator.

The Lightning port is surrounded by foam for dustproof and waterproof.

This is an unknown component, but we guess it might be used to detect the status of the lid, which is similar to MEMS microphone.

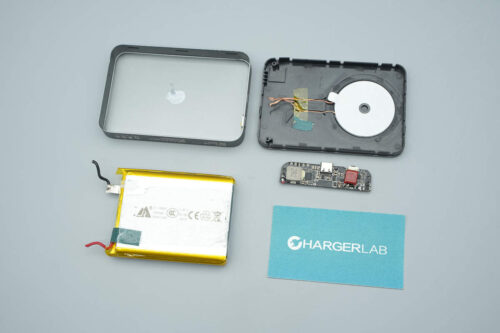
This is the battery of charging case. Model is A2516.
Rated capacity is 345mAh/1.327Wh.
Rated voltage is 3.85V.
Limit voltage is 4.45V.
The manufacturer is DESAY.

This is the back of the battery.

Front of the protective plate of lithium battery.

Back of the protective plate of lithium battery. And the contacts are spot welded on the plate.

Close-up of the coil and PCB.

The charging coil is placed on the ferrite sheet.

This is the microswitch of the pairing button.

This is the resonant NPO capacitor.

And this is the wireless charging chip, which comes from Broadcom 59356A2KUBG.

Front of the PCB.

Front of the PCB.

A chip of T5HN.

A chip of T4.

A chip of 6Y2.

A chip of E+11.

A chip of C1 4Y6.

A chip of 8K16F3.

This chip comes from STMicroelectronics STM32L496WGY6P.

Info of STM32L496WGY6P.

A chip of 3441.

A chip of T5LL.

This is Apple's customized chip, marked with 343S00517.

The second chip of 3441.

A chip of 18H208.

A chip of 8L11C6.

This is the charging IC from NXP 610A3B.

A chip of 32An.
Summary of ChargerLAB
Well, the design of AirPods 3 charging case is close to AirPods Pro, but a little bit smaller.
But actually, the internal structure is very different.
The internal structure of AirPods 3 charging case is relatively simpler.
Compared to AirPods Pro, it only has one battery. And a lot of glue is used for fixing.
Source: 52audio.com