Get the software in this Telegram link:
https://t.me/+oGliSbeuYts1Y2Y1
Submit feedback in this WhatsApp link:
https://chat.whatsapp.com/JcONNVgLlZmEupdvJX8H3D
Introduction
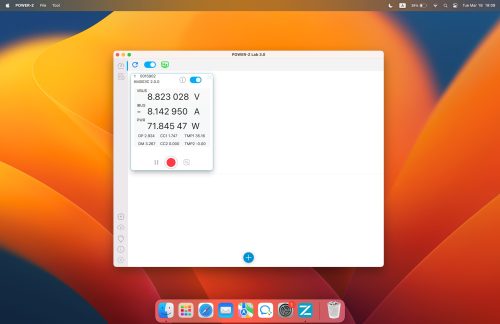
ChargerLAB's POWER-Z series has gained immense popularity among fans worldwide. Its companion PC software, POWER-Z Lab, enhances the functionality of the testers by enabling features like charging curve visualization, data export, and multi-device management. Today, we're thrilled to announce that we have finally brought it to Mac OS! Additionally, this new version of the software also supports Windows 10/11 and Windows 7.
Beyond introducing Mac compatibility, the new POWER-Z Lab V3.0 software has been completely redesigned to meet the growing demand for multi-device testing across different models. Compared to previous versions, this update improves multi-device compatibility, long-duration testing, and data storage. The interface has also been refined to make all functional buttons more intuitive and accessible.
One key change in this version is the adoption of a multi-window mode, allowing multiple connected testers to run and be managed simultaneously. Data storage is now handled in real-time on the hard drive, ensuring that even in the event of a power failure or reset, no data is lost—offering a more secure and reliable experience.

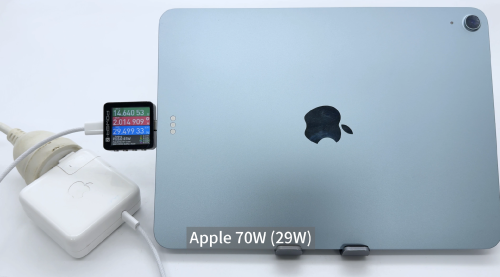
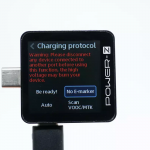
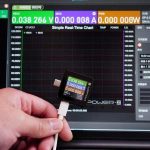
Before using the software, you’ll need to connect your tester to your computer using a USB-C cable. For new users, it's important to note that the connection must be made via HID Port 3, as this is the only port that supports communication with the PC.
1. Main Interface
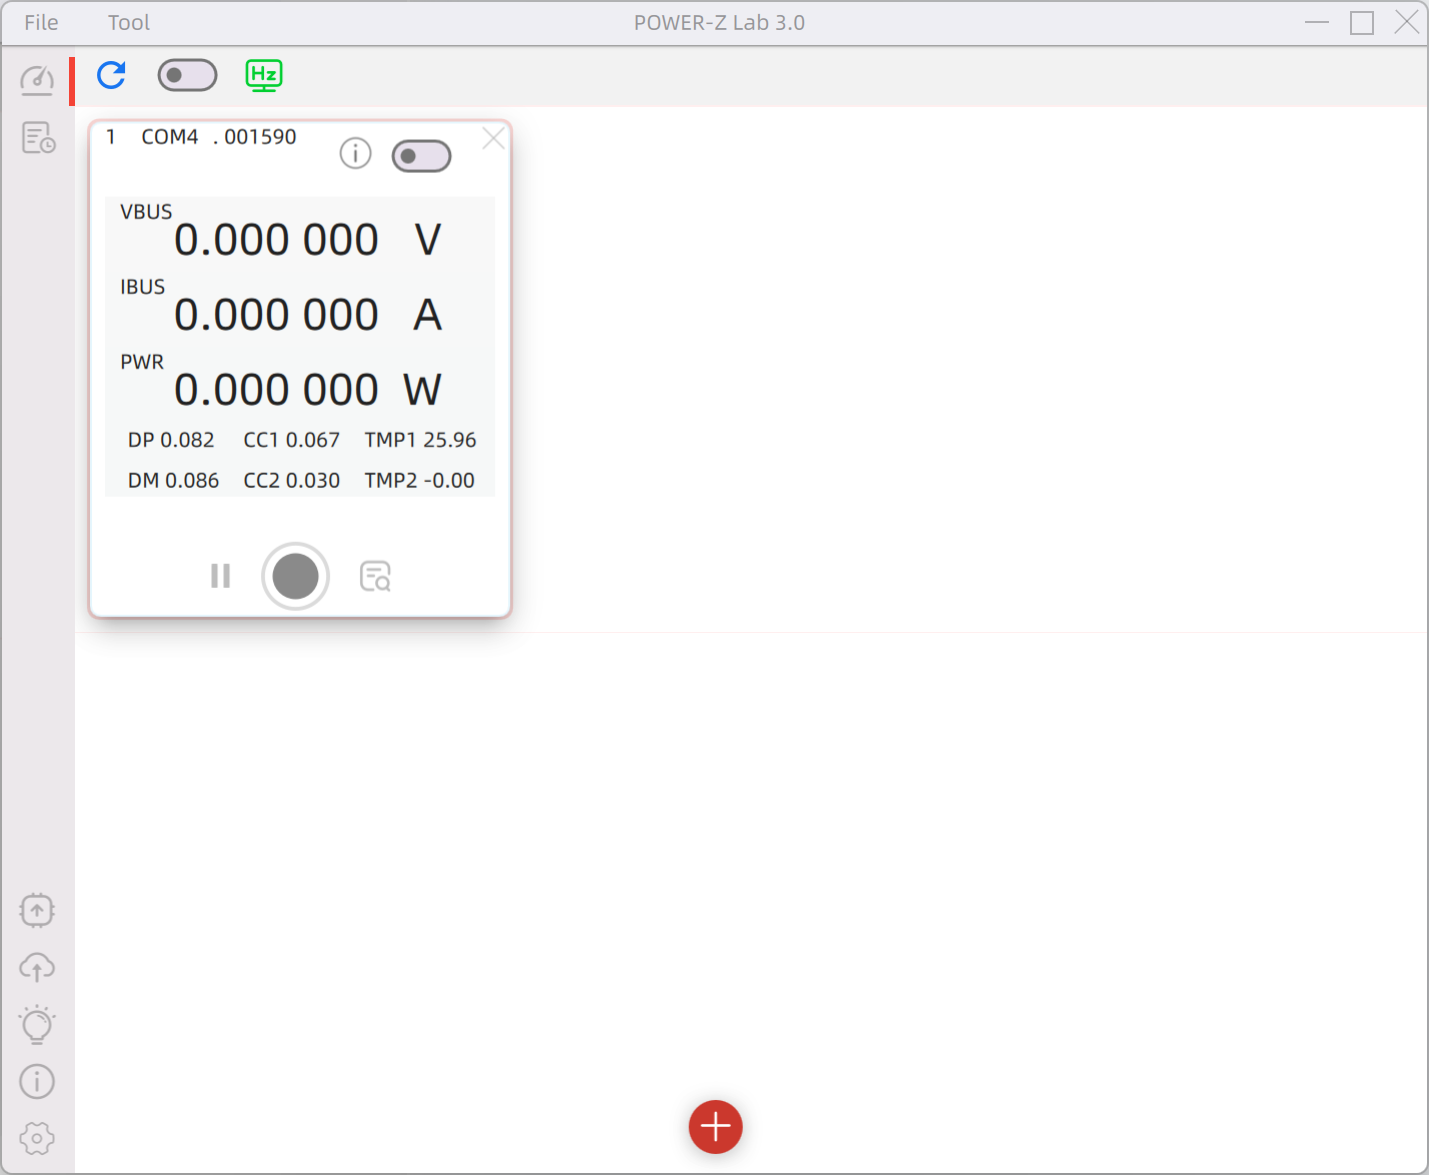
The main interface of POWER-Z Lab V3.0 consists of several sections: the status bar, function switch, data display area, and settings. Notably, both the Windows and Mac versions share the same interface and functionality. In this demonstration, we’ll use the Windows version as an example.
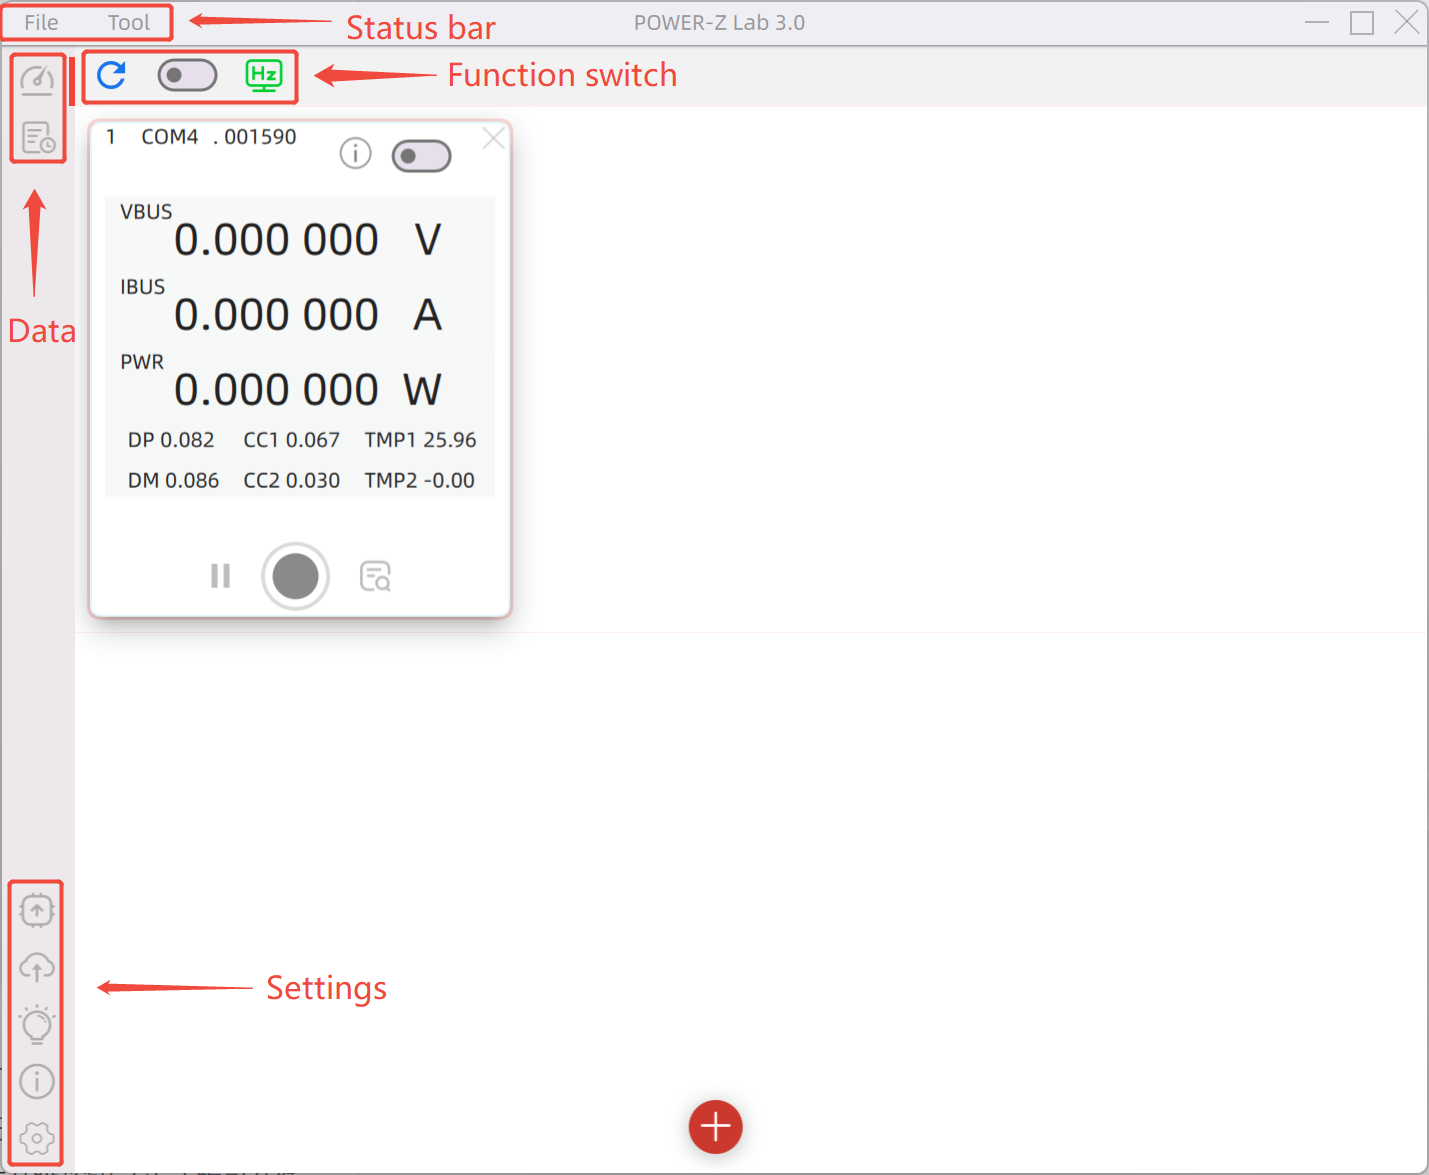
The status bar is divided into two sections: File and Tool. The File menu allows users to import data saved from other computers or previous versions of the software. The Function Switch provides a one-click connection to all testers, with a refresh button on the left for updating connected devices and a adjust refresh rate option on the right.
The Data Display Area presents real-time information from connected testers and provides access to historical data. Meanwhile, the Settings includes options for firmware upgrades (which can be updated online in the official release), software updates, tutorials (with links to the official POWER-Z website), about section, language selection (English/Chinese), and theme customization.
2. Device Connection
To connect a device using POWER-Z Lab V3.0, follow these steps:
- Connect the tester to the computer via the HID port.
- Upgrade the tester’s firmware to version 2.0.0—otherwise, all features will not function properly.
- The firmware file can be found inside the firmware folder inside the POWER-Z Lab V3.0 software package.
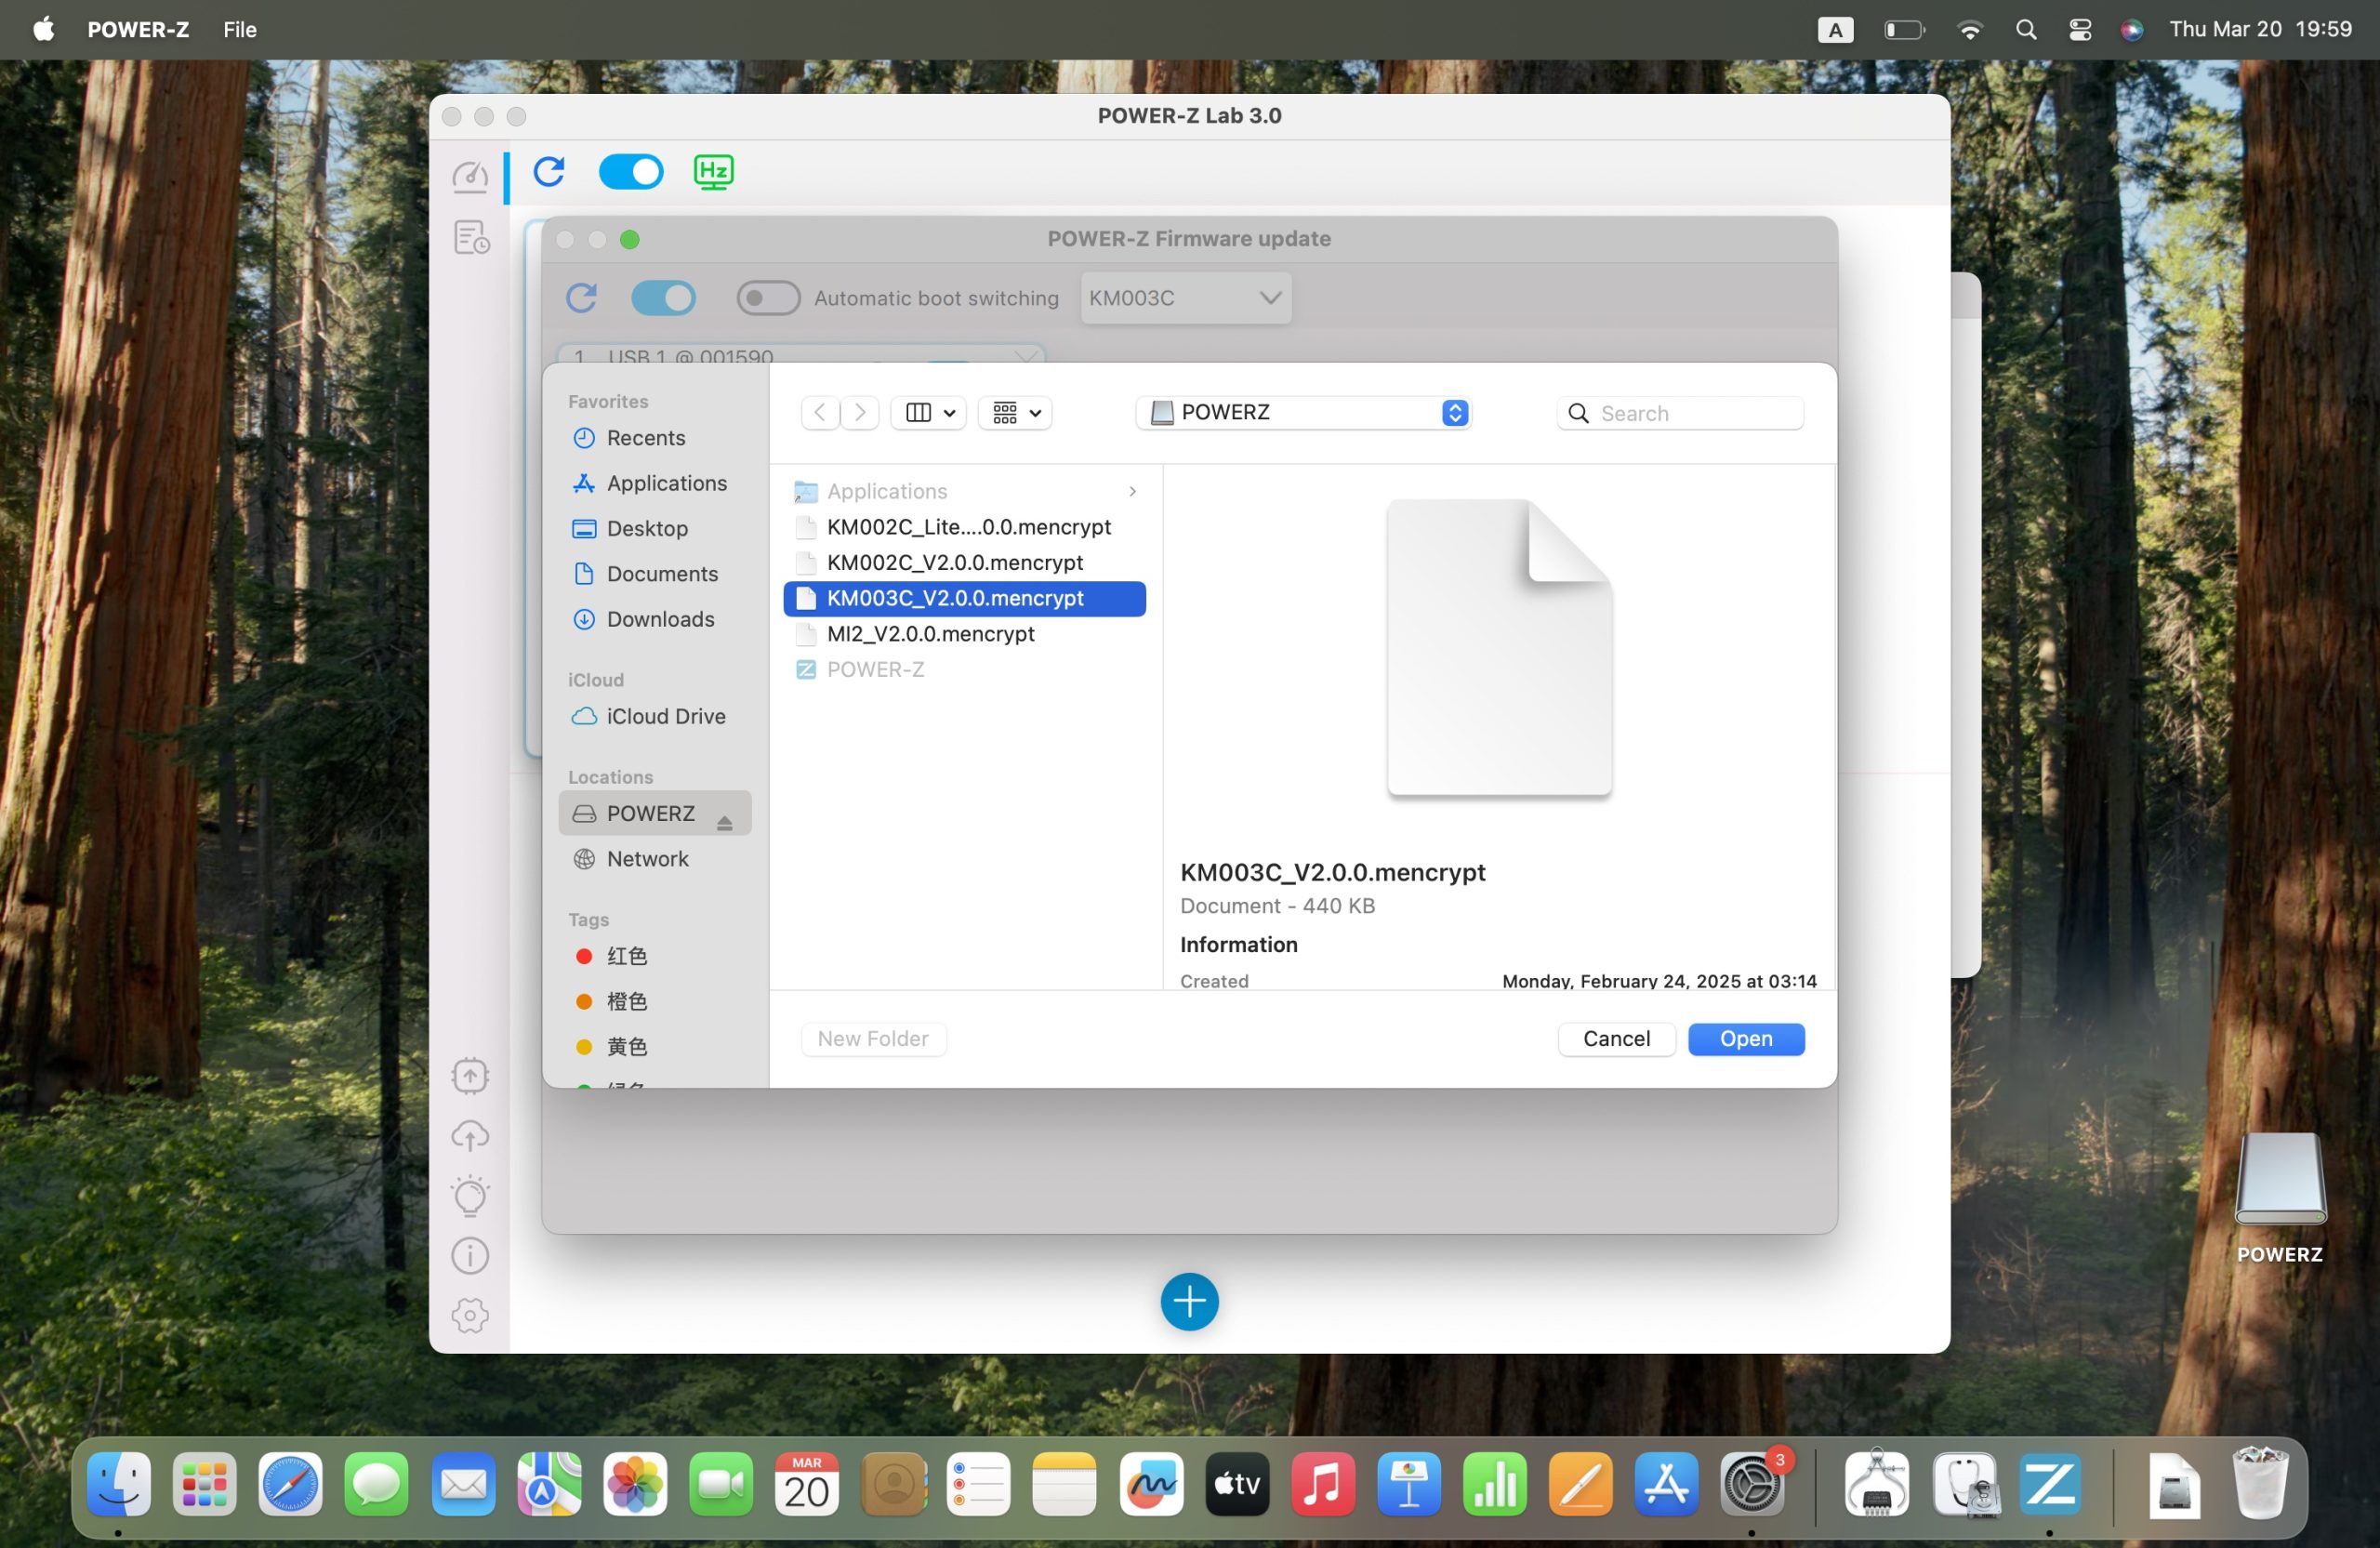
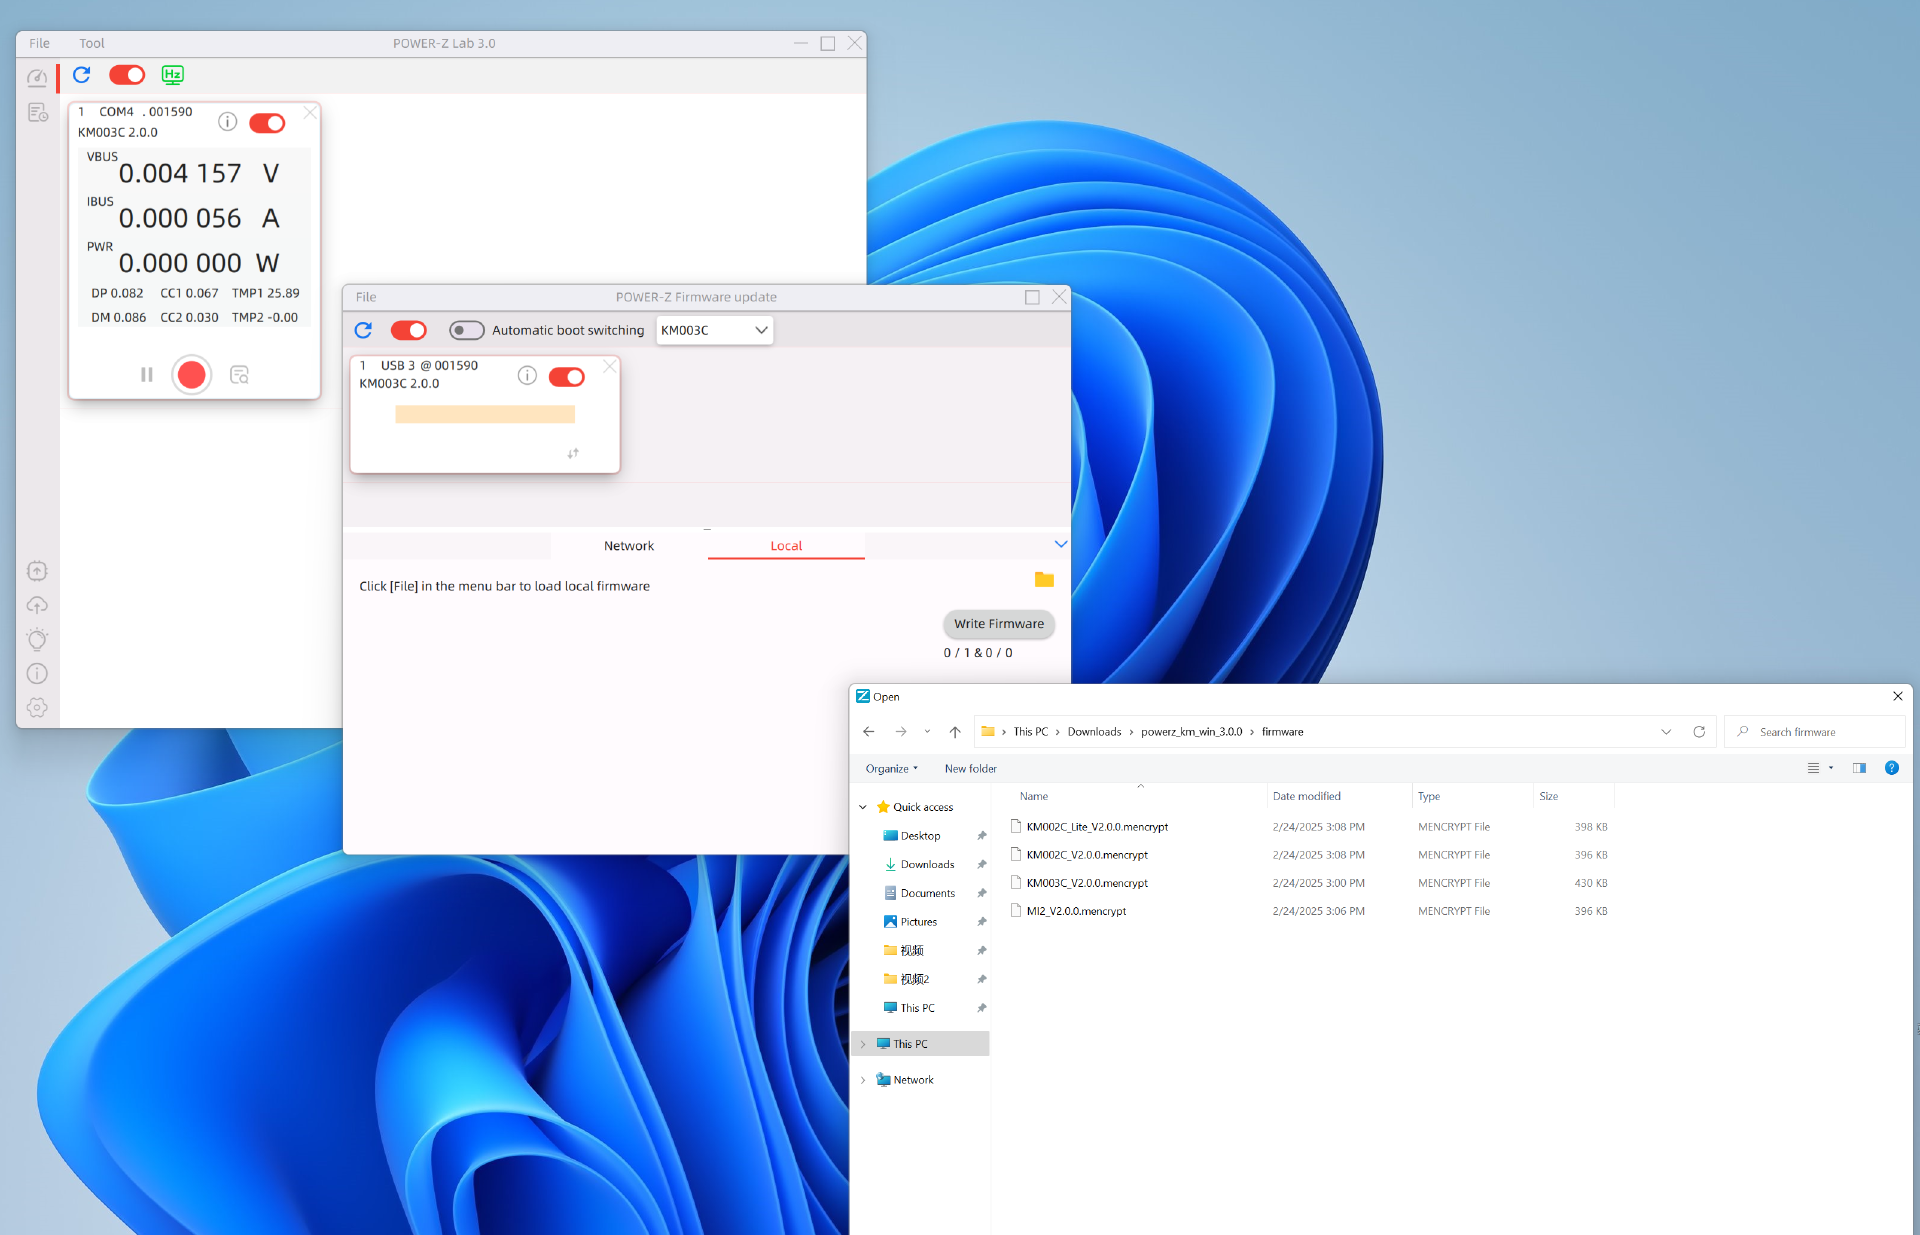
To update the firmware:
- Click on Tool → Firmware Update.
- Click the folder icon on the right and select the firmware file with the .mencrypt extension.
- Click Write Firmware to begin the update.
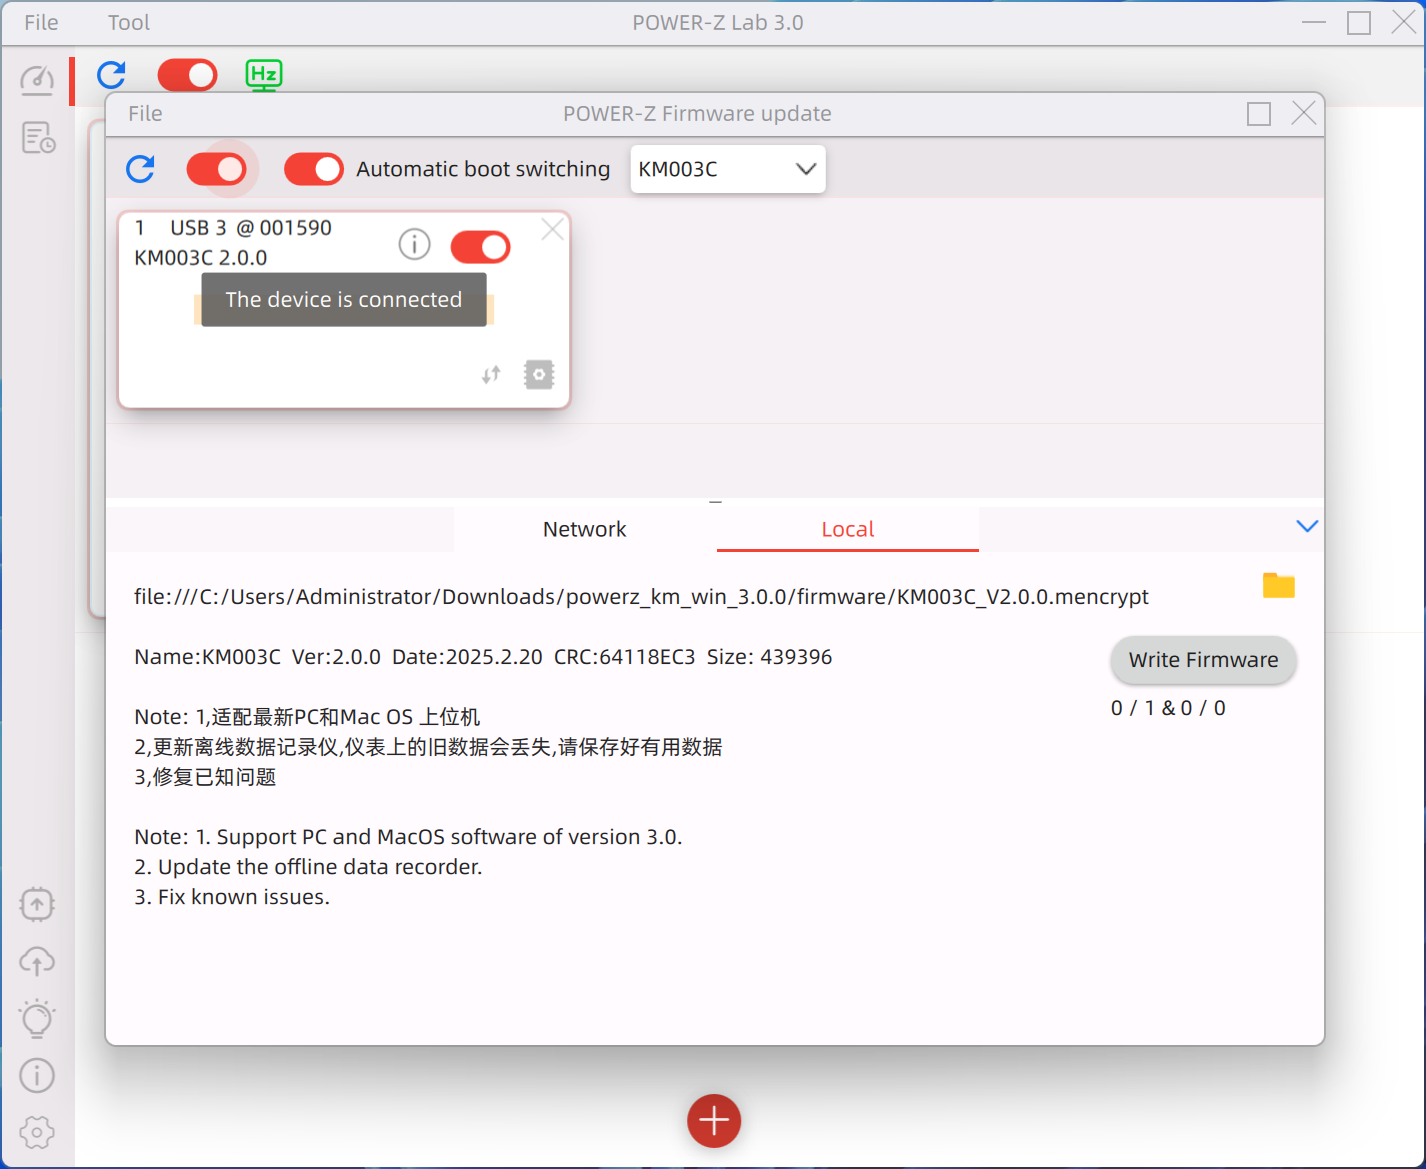
The firmware update feature supports both single-device updates and batch updates. If updating multiple testers simultaneously, enable the batch update mode using the two toggle switches in the top left corner, then follow the same steps mentioned before to complete the update.
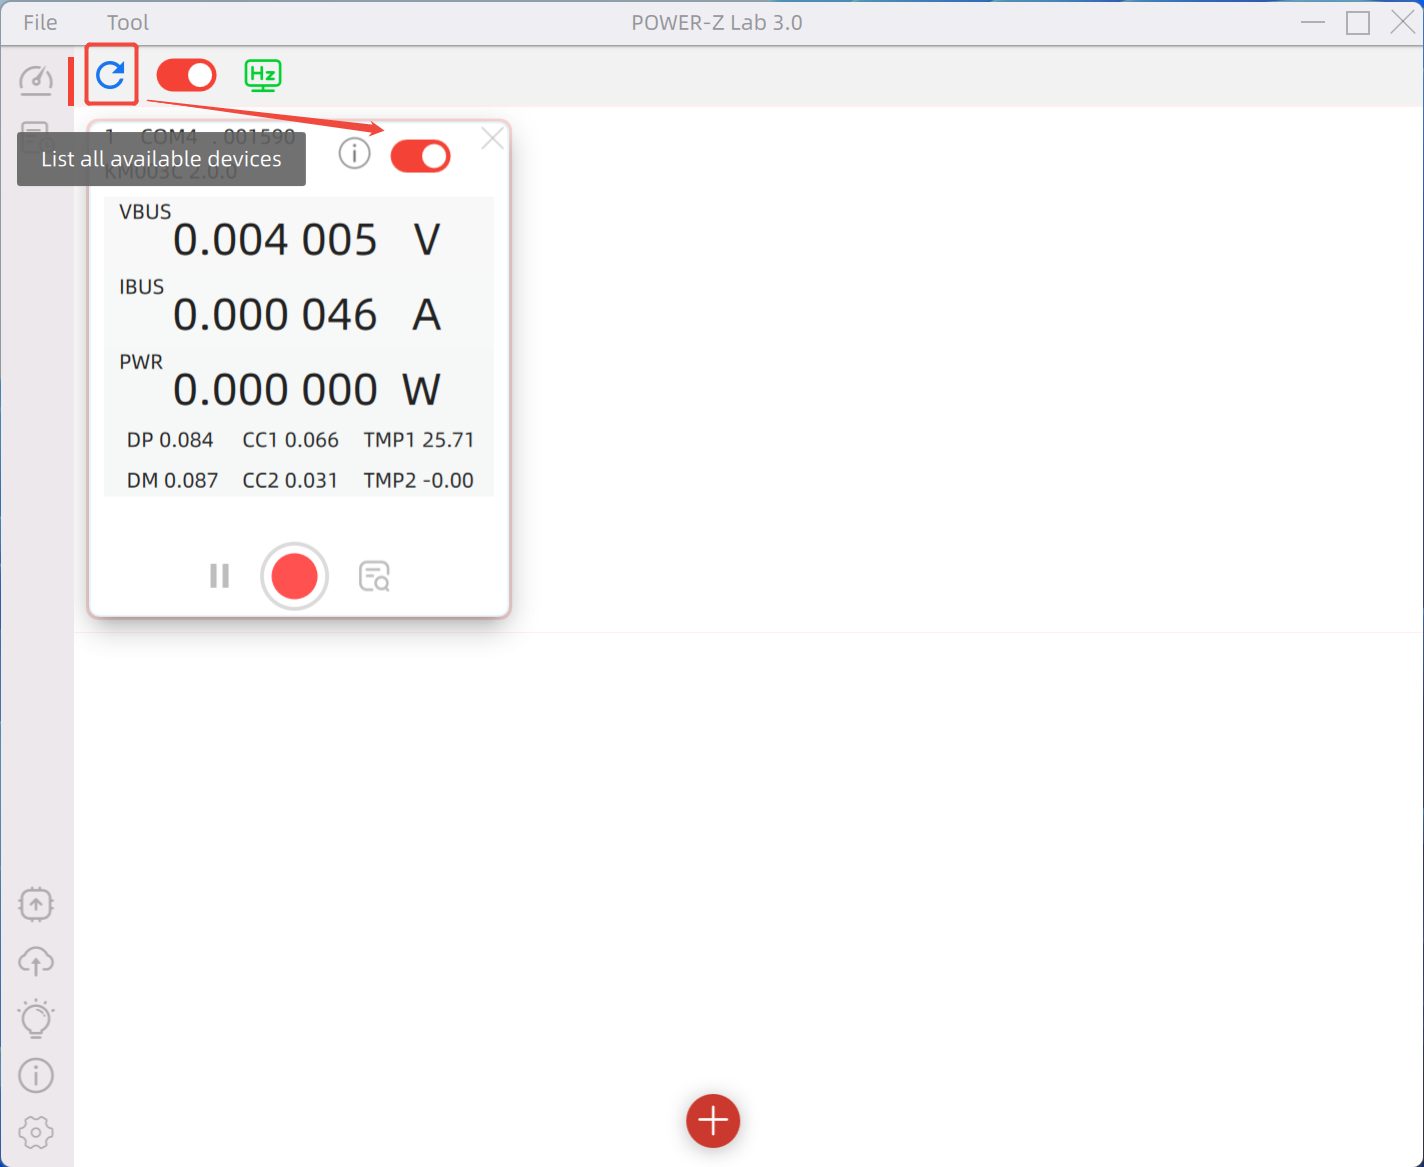
After completing the first update, reconnecting the software requires listing all available devices before the newly connected tester appears. Then, simply toggle the switch to start using it.
3. Data Logging
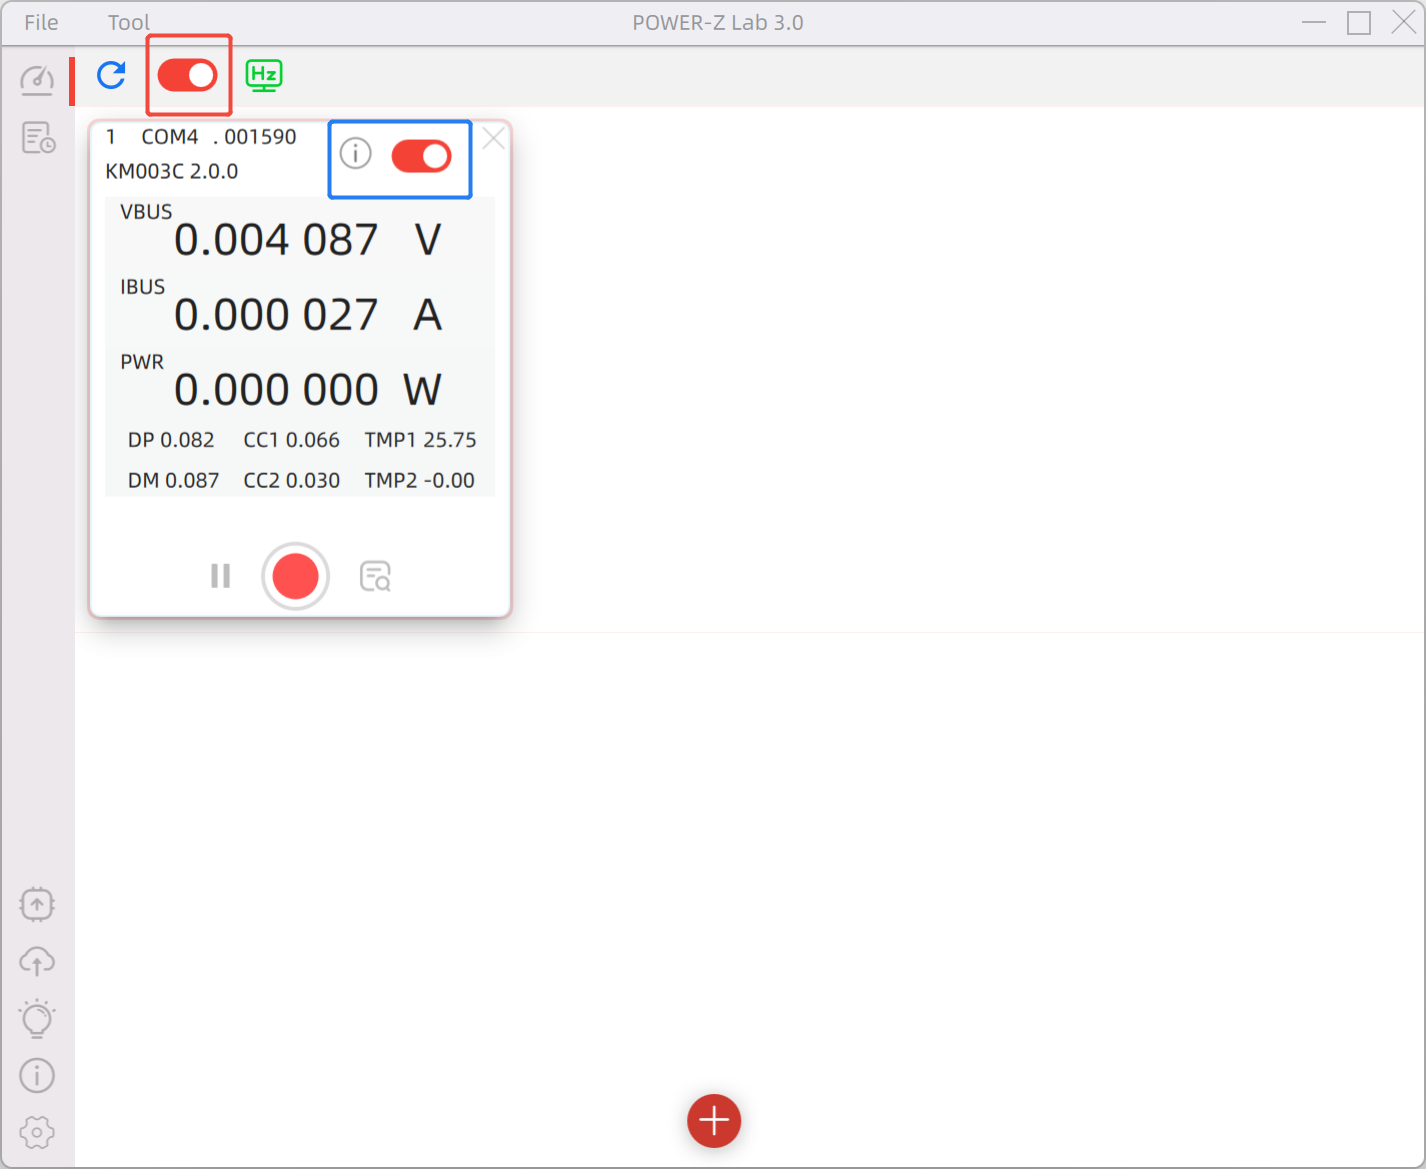
You can choose which testers to connect using the Toggle Switch in the blue box. To connect multiple devices at once, enable the Function Switch in the upper-left red box.
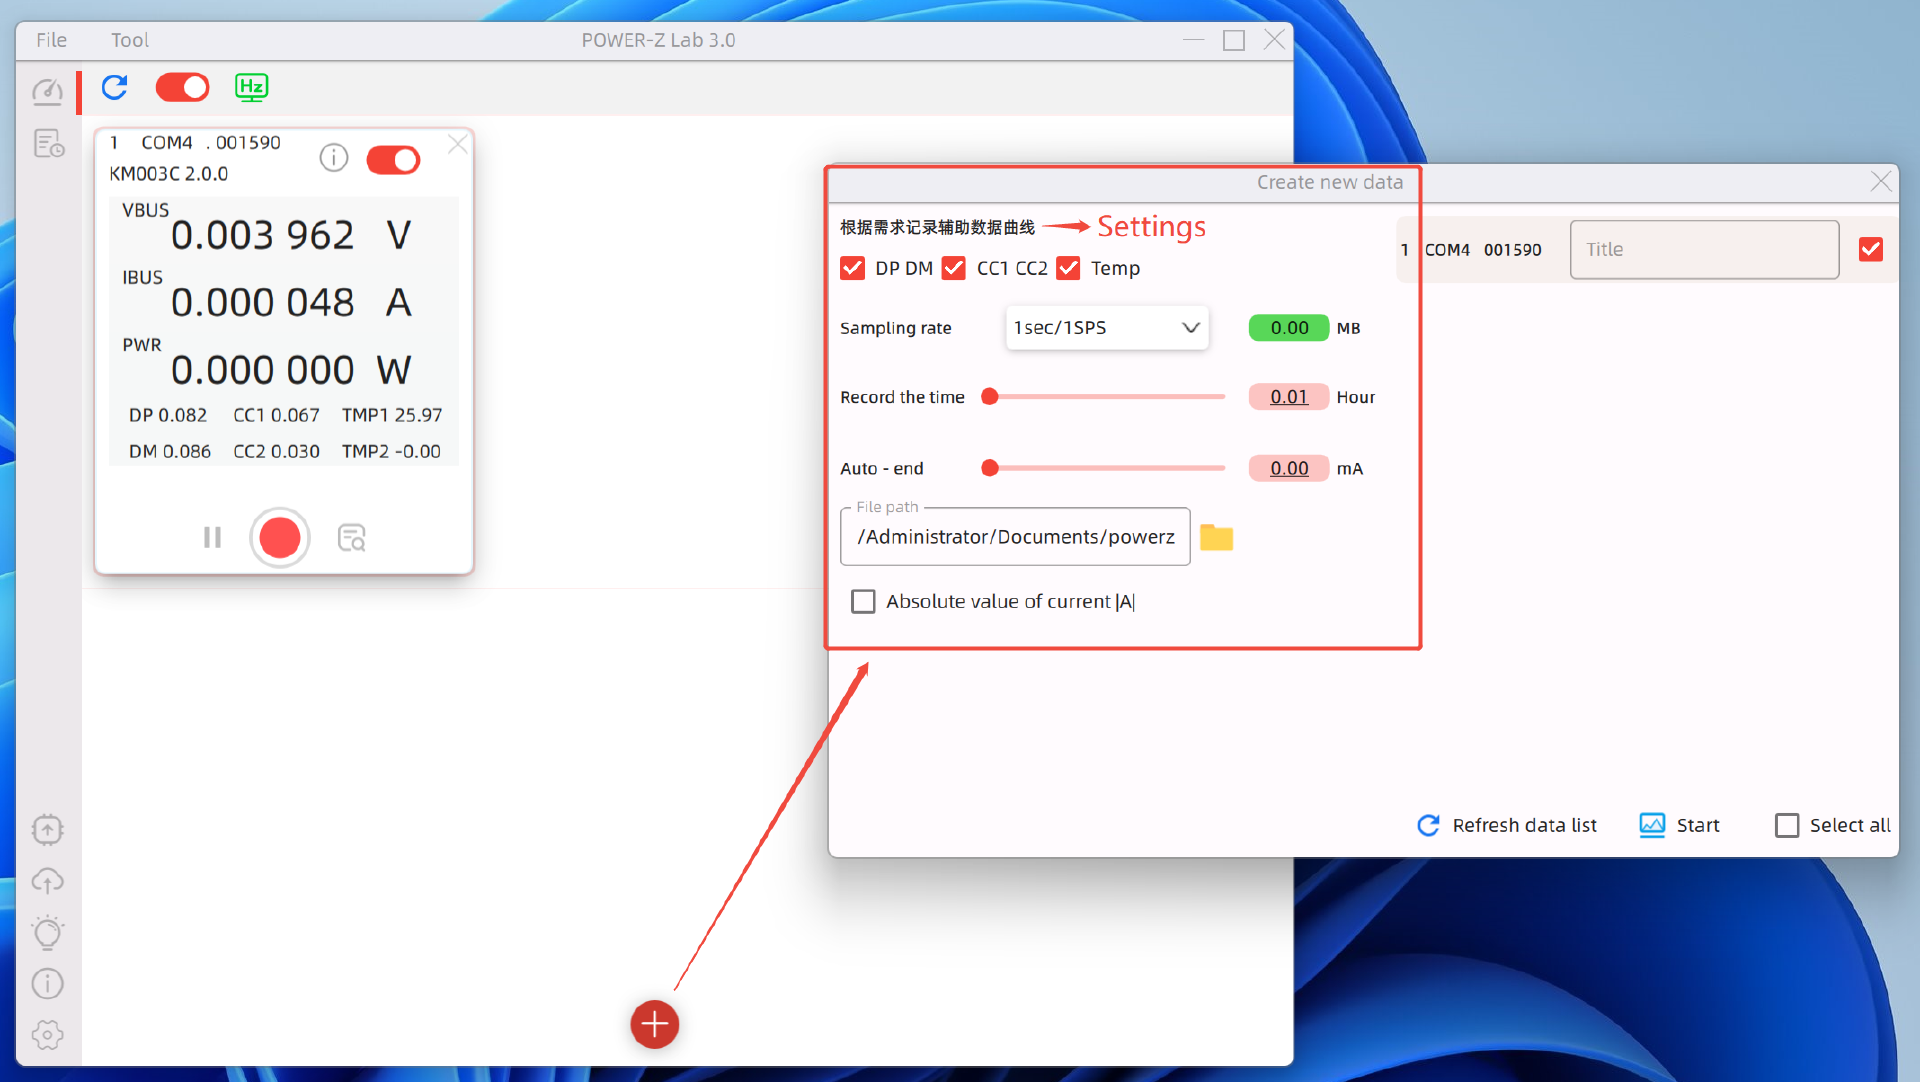
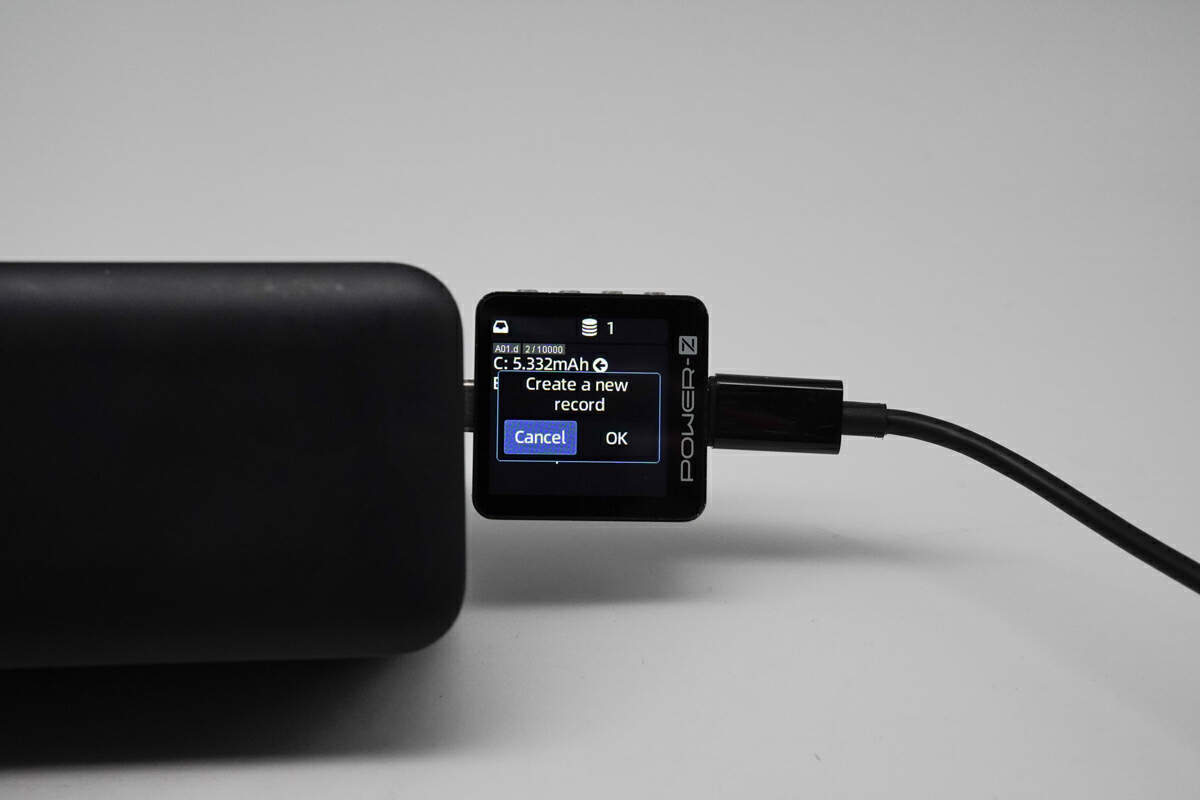
Once connected, click the “+” button to enter the parameter settings page, where you can configure the following options:
- DP/DM, CC1/CC2, Temperature Data
- Sampling Rate (Adjustable from 0.1–1K SPS)
- Recording Cutoff Time
- Recording Cutoff Current
- Automatic Data Save Path
- Current Absolute Value Threshold
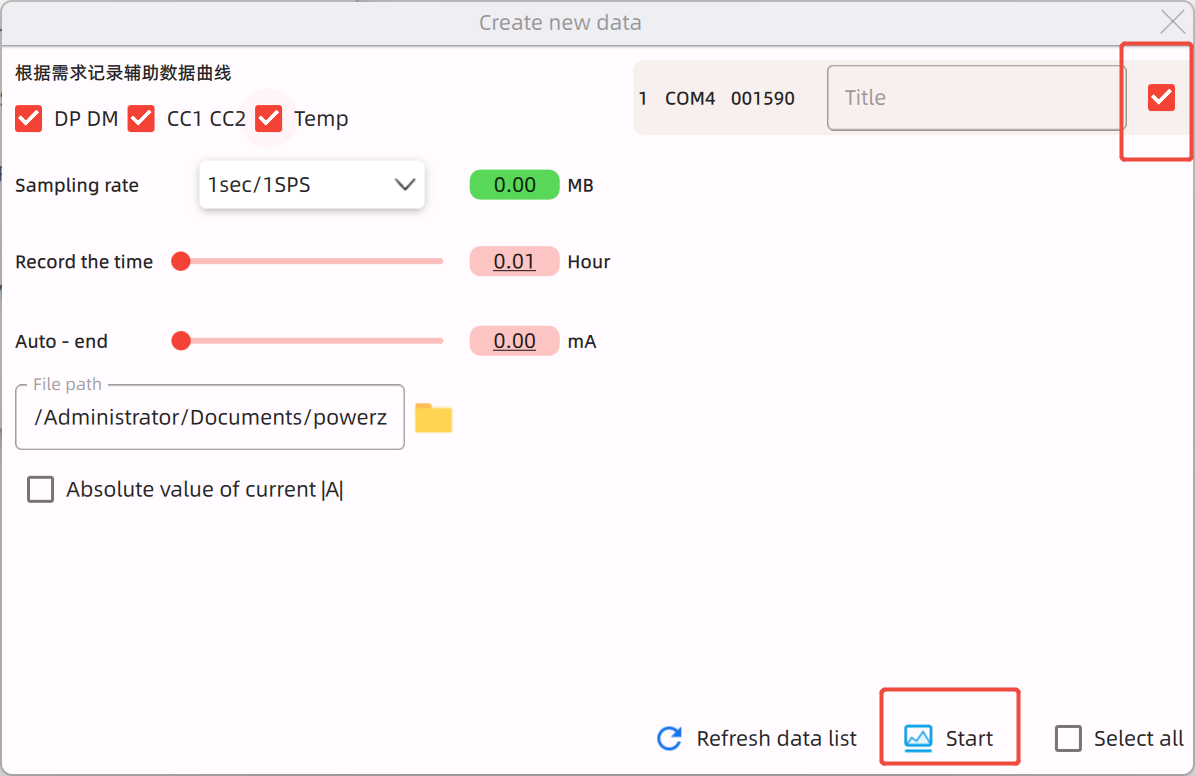
After setting up the parameters, choose an appropriate save path, select the testers you want to apply the settings to, and start testing.
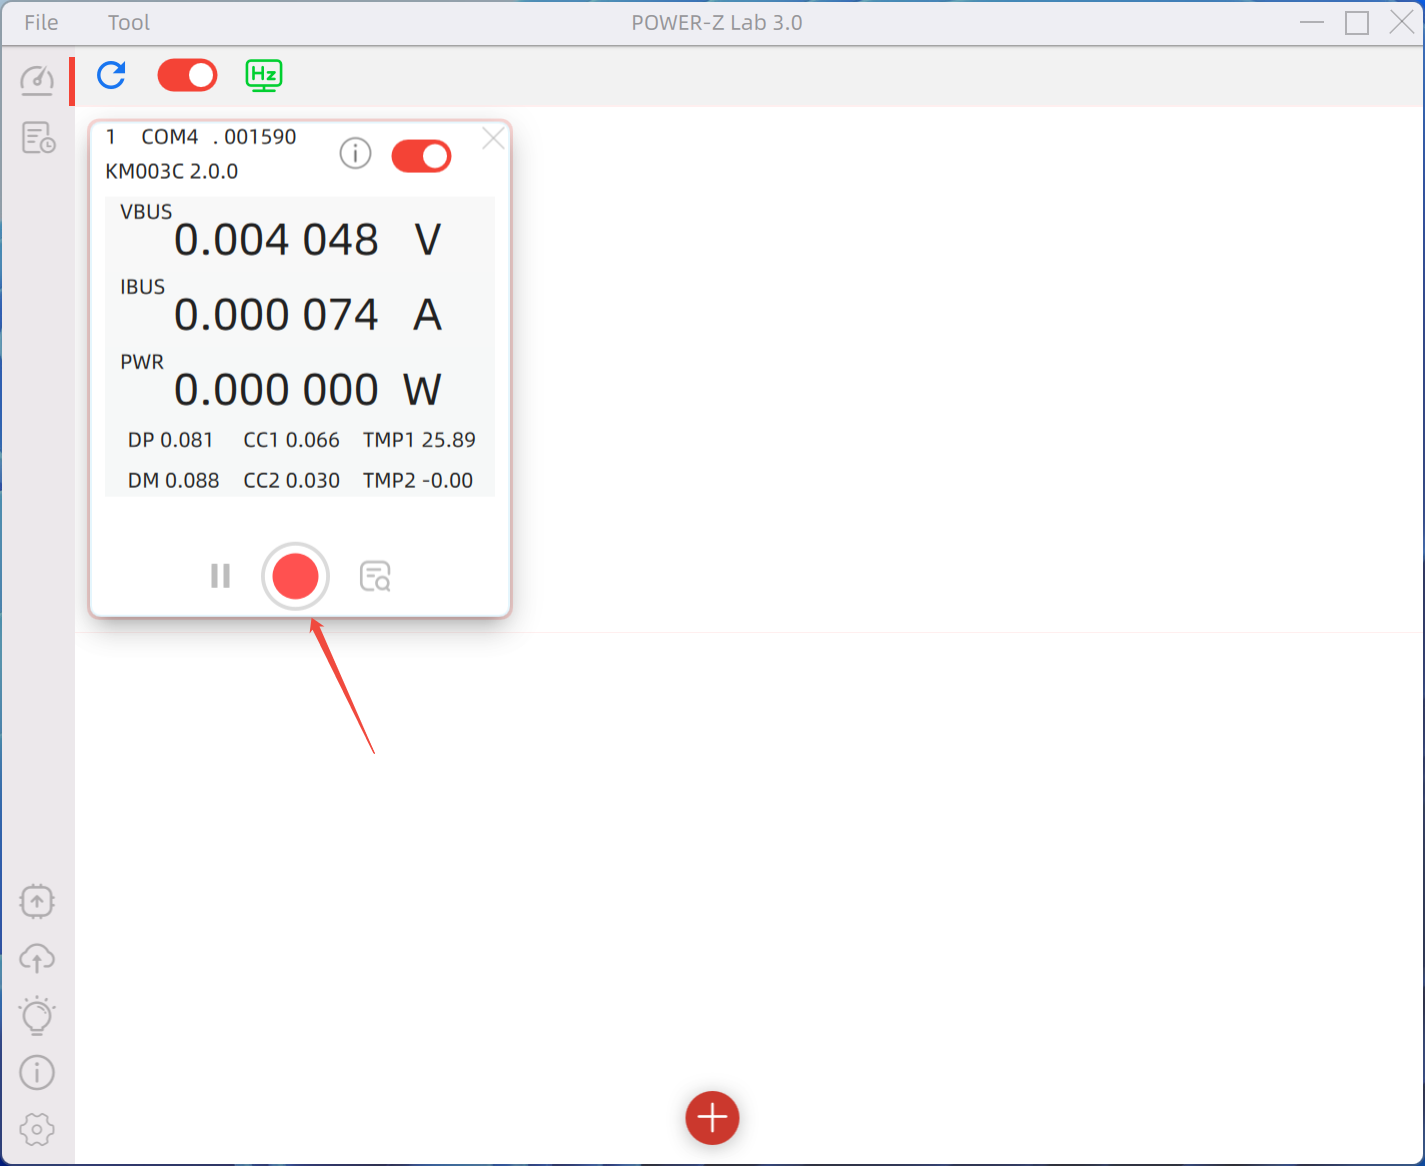
Even after data logging has begun, individual testers can still be controlled separately.
4. Viewing Data
Once data logging starts, you can view recorded data by following these steps:
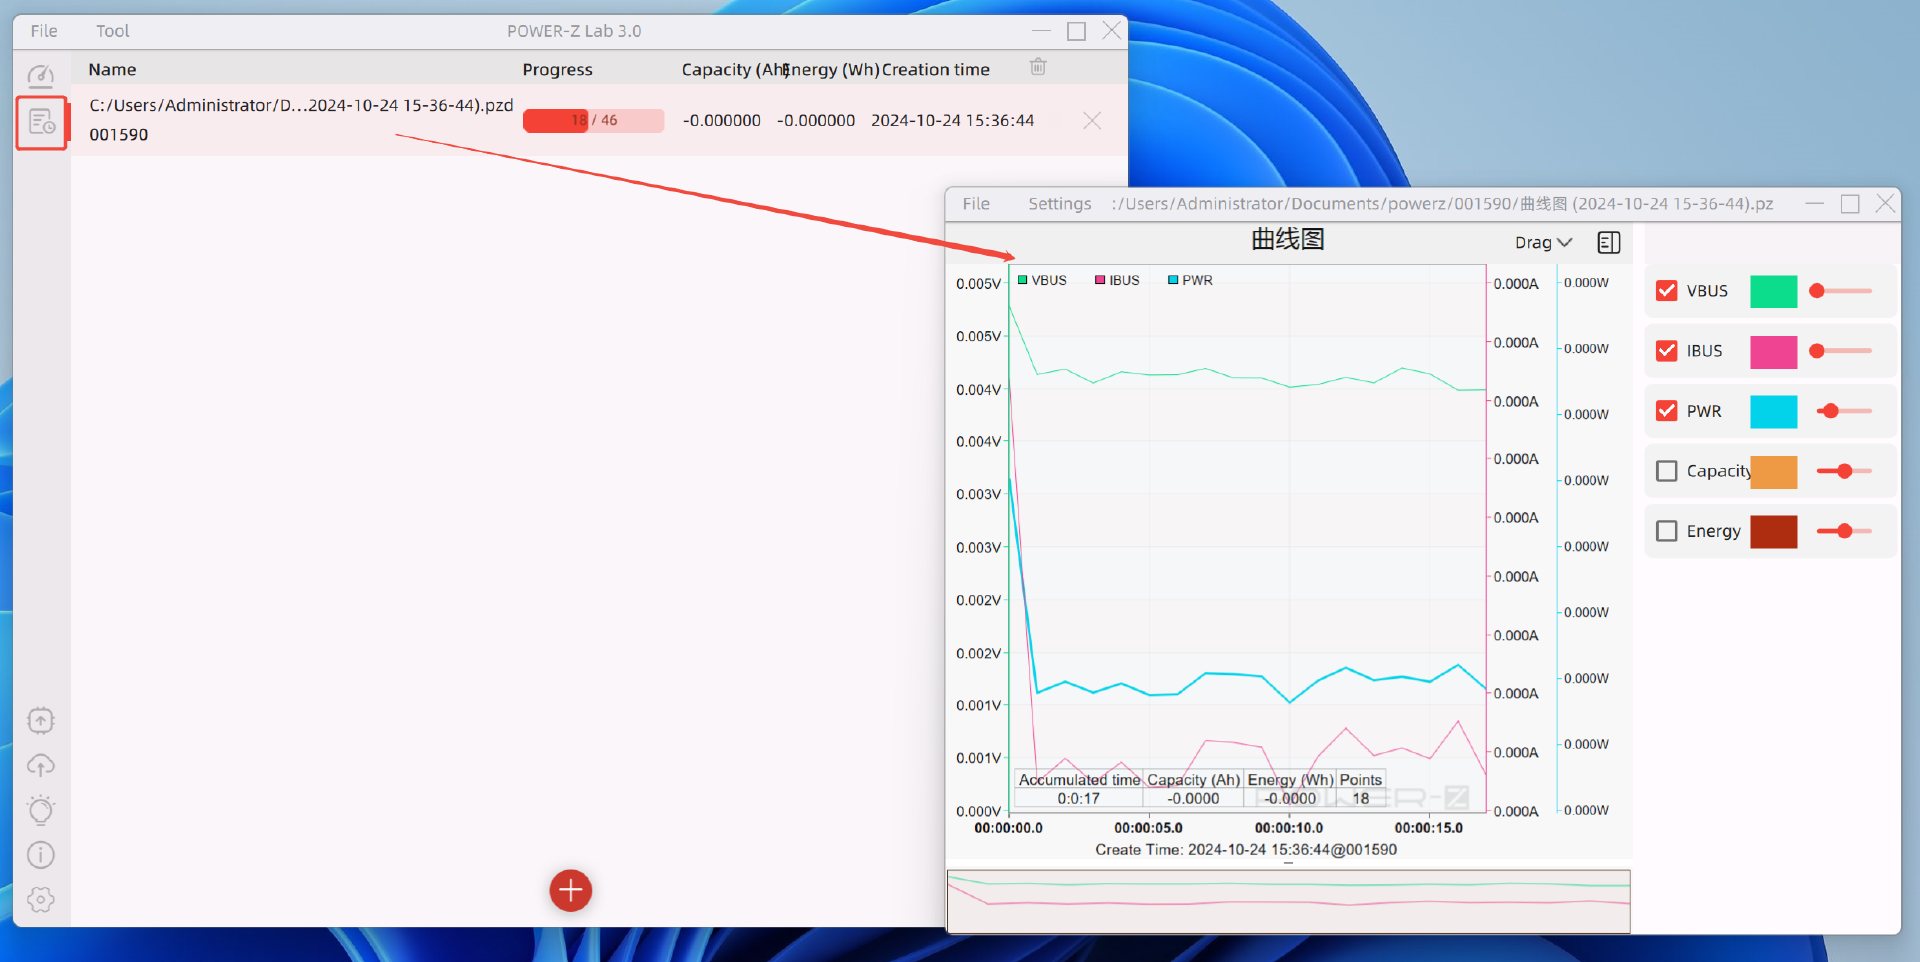
Click the “Past Data” button to display all saved records, including their capacity, energy, and creation time.
Double-click any record to view its corresponding charging curve in real-time. Multiple datasets can be viewed simultaneously.

During the logging process, the system automatically creates a folder and continuously saves data as PZD format files. These files cannot be opened directly but can be imported into the software for later review. Additionally, once a tester is successfully connected, its data will appear in the Historical Data section, ensuring that no information is lost.
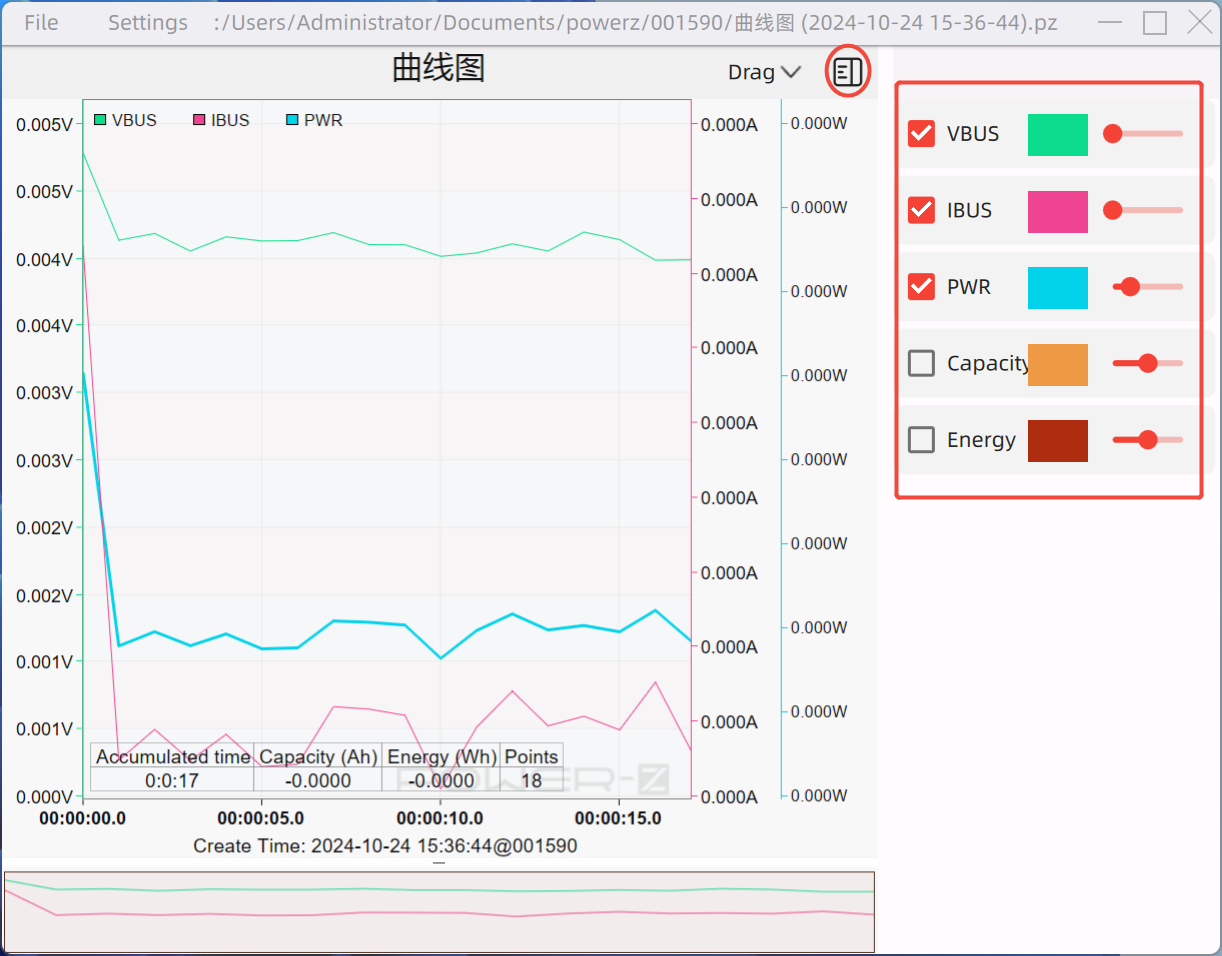
Inside the curve graph, users can:
- Toggle visibility for specific data series using the switches on the right.
- Adjust the thickness (5 levels) and color of the curves.
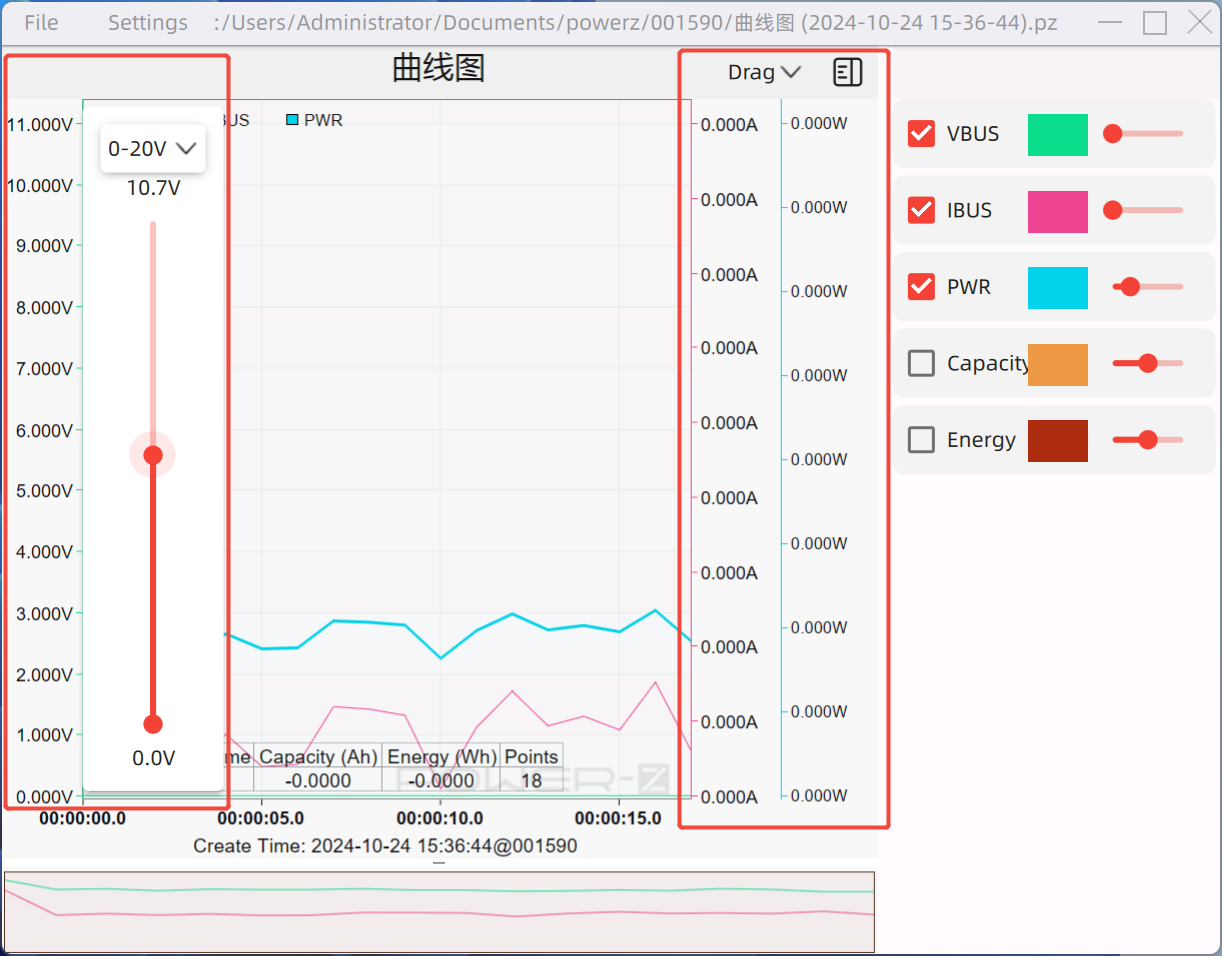
Click on any axis to manually adjust the range (e.g., setting voltage to 0–20V).

Use the drag function (top-right button) to zoom in on key data points using the mouse scroll wheel.
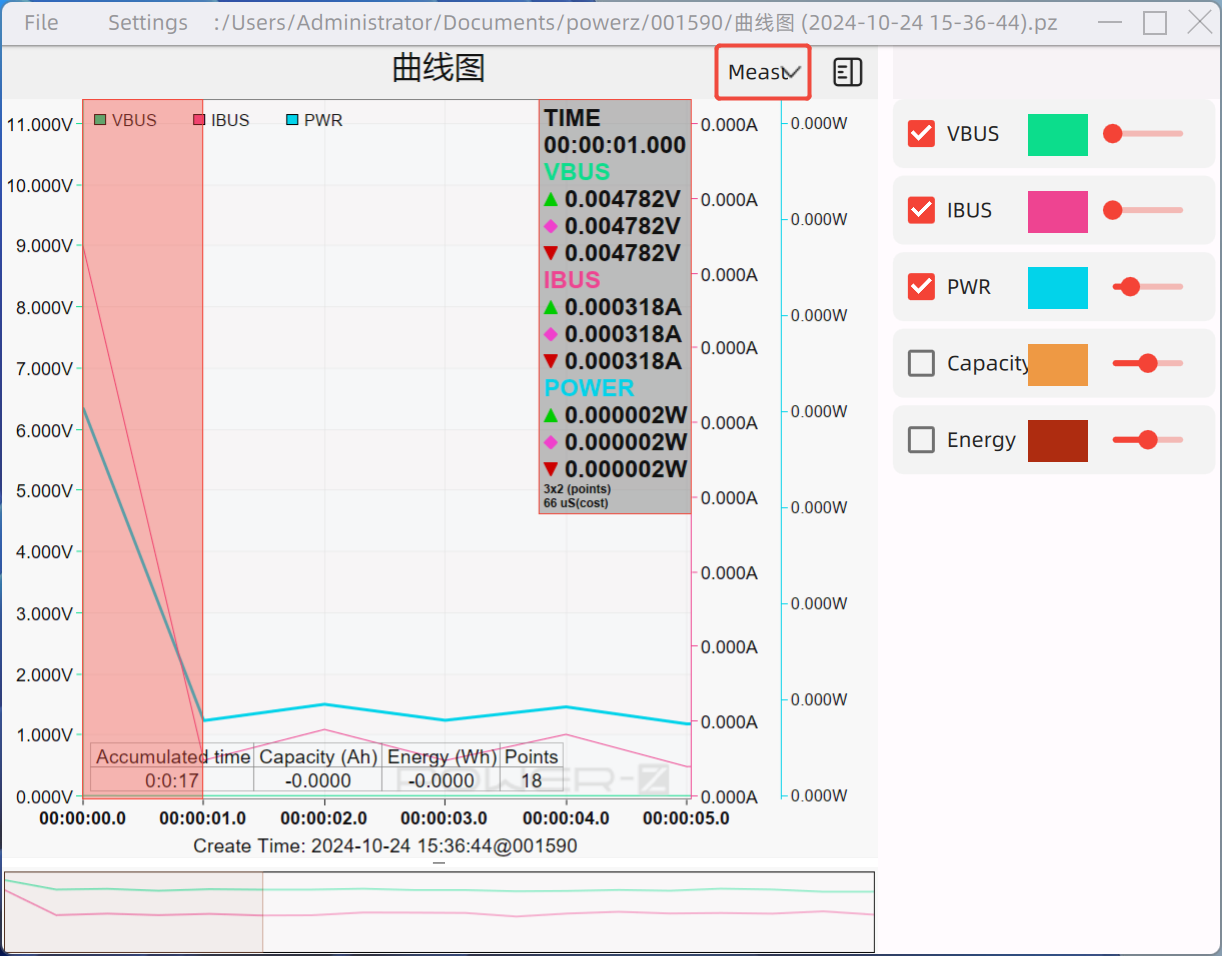
Enable the measurement tool by clicking and dragging with the left mouse button to measure the difference between any two data points—only extreme values within the selected range will be calculated.
5. Exporting Data
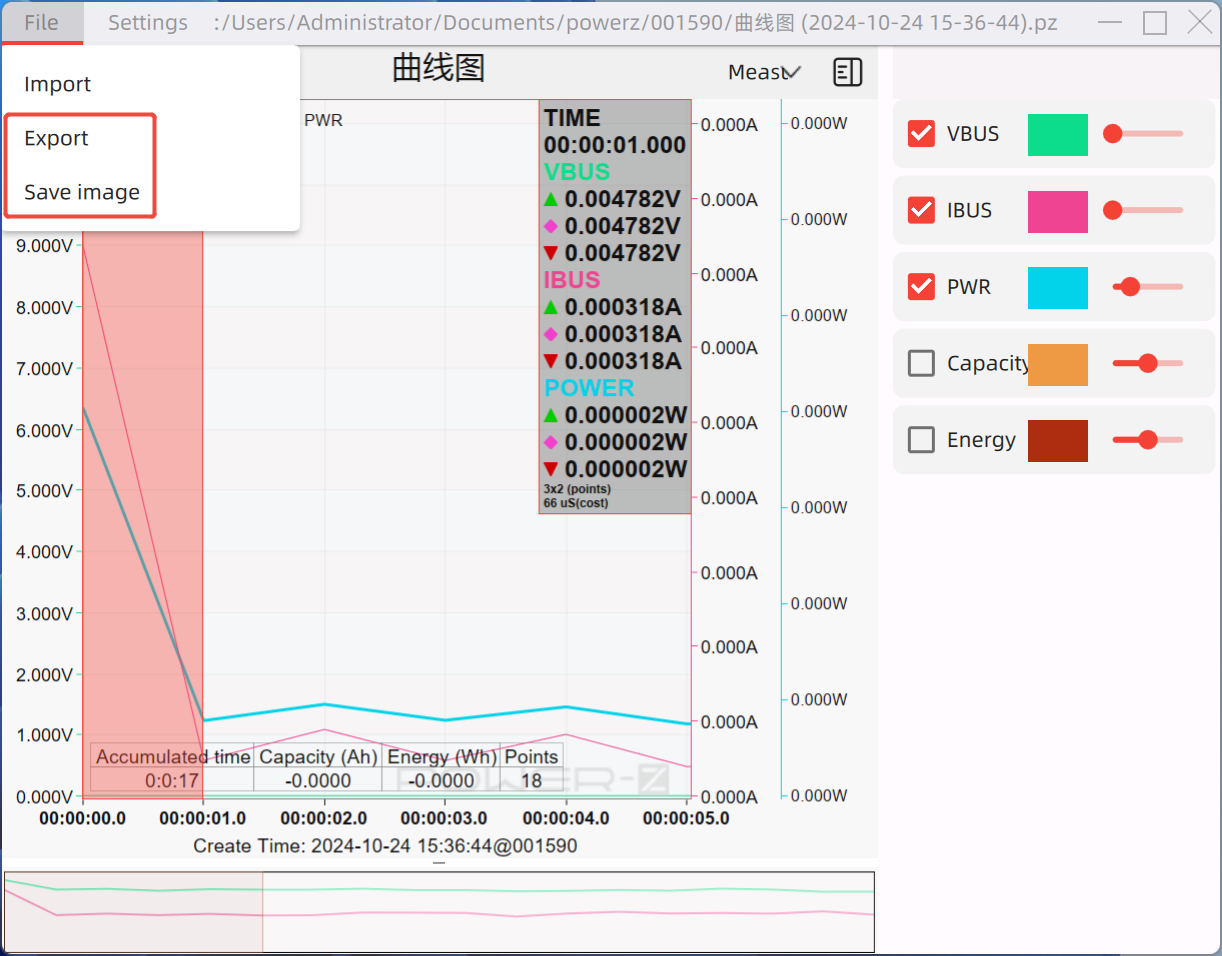
If you need to convert recorded data into an Excel spreadsheet or image file, simply:
- Click File → Export to save data in CSV format.
- Click Save Image to export data as a picture.
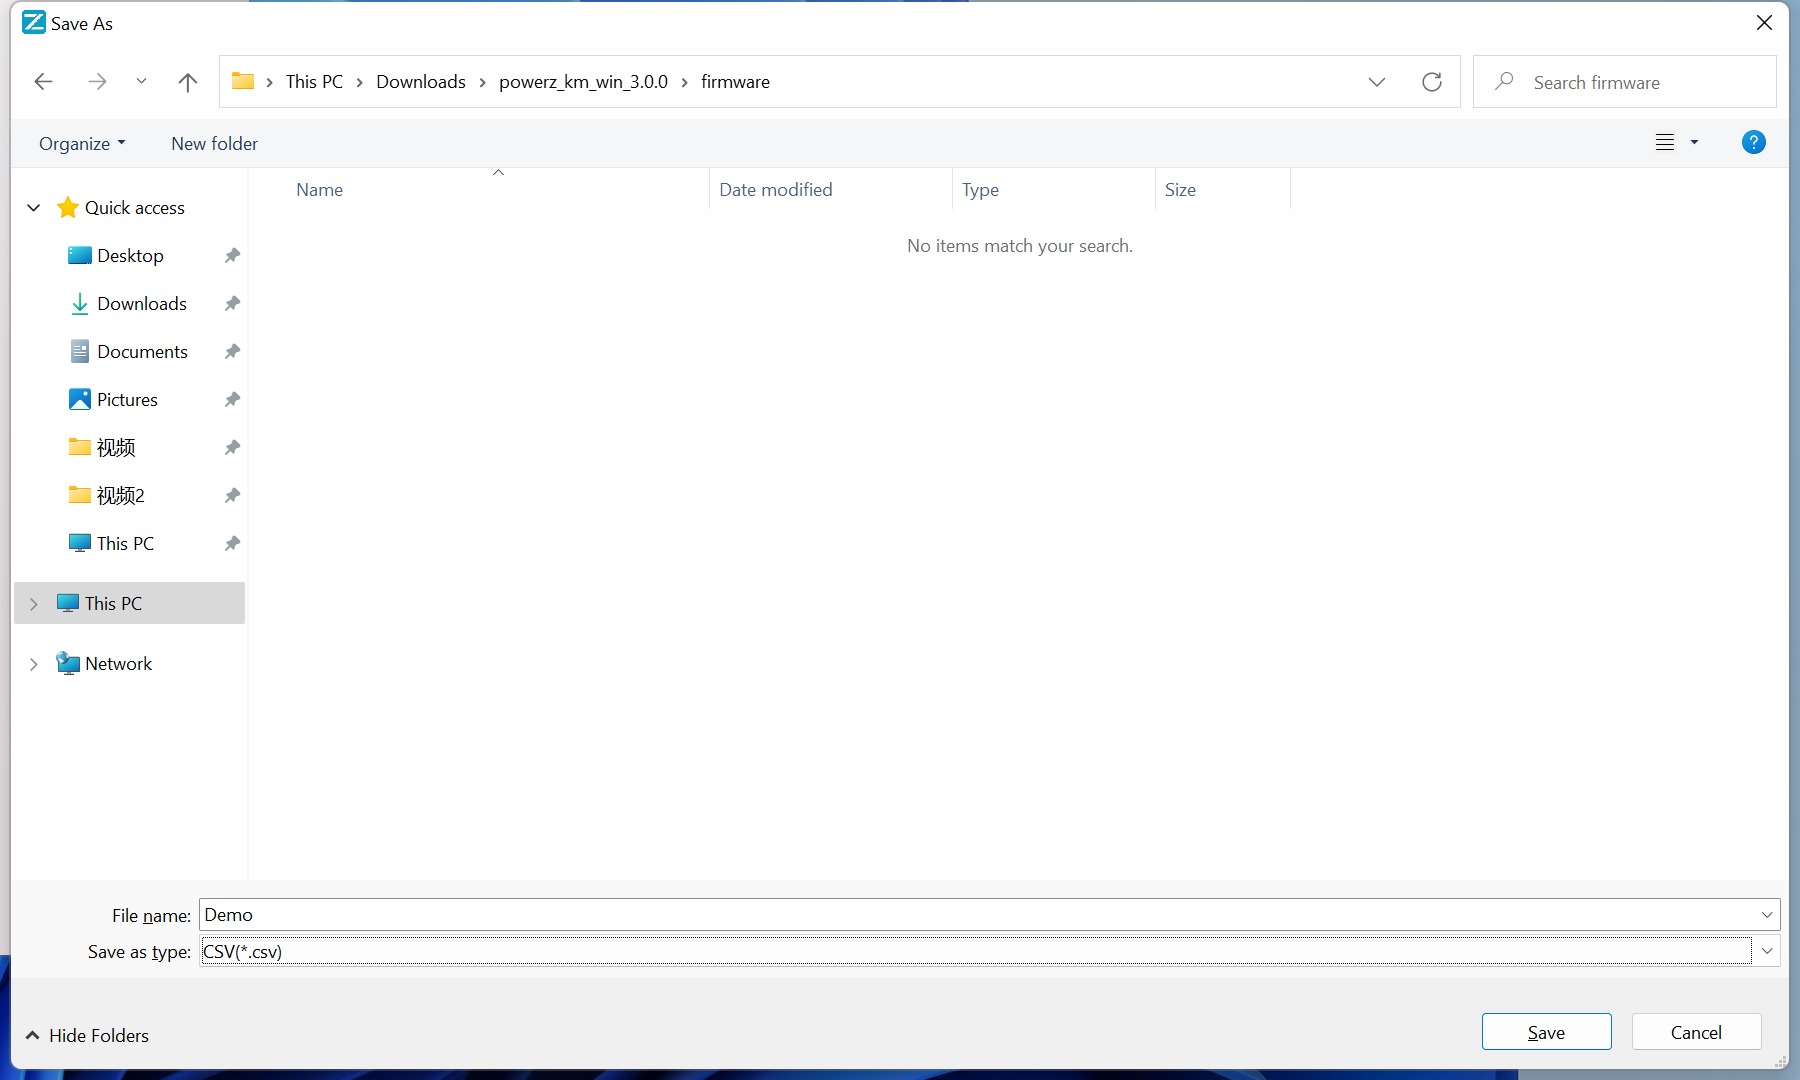
When exporting in CSV format, select your preferred save location and click Save. The file can be opened directly in Excel for further analysis.
Important Note for All Users
Currently, the POWER-Z Lab V3.0 software has two major known bugs:
- Offline data viewing is not supported. This means that data recorded independently using the tester cannot be accessed in the Mac version. To view data, you must keep the tester connected to your Mac during measurement.
- The KM003C must be upgraded to firmware V2.0.0 to work with the Mac version, but this version cannot read a cable's E-Marker. If you need to use this function, you will need to downgrade the firmware.
How to Downgrade Firmware Using POWER-Z Lab V3.0
If you require E-Marker reading, you can downgrade your KM003C using any version of the POWER-Z Lab software. Below is the downgrade process using POWER-Z Lab V3.0:
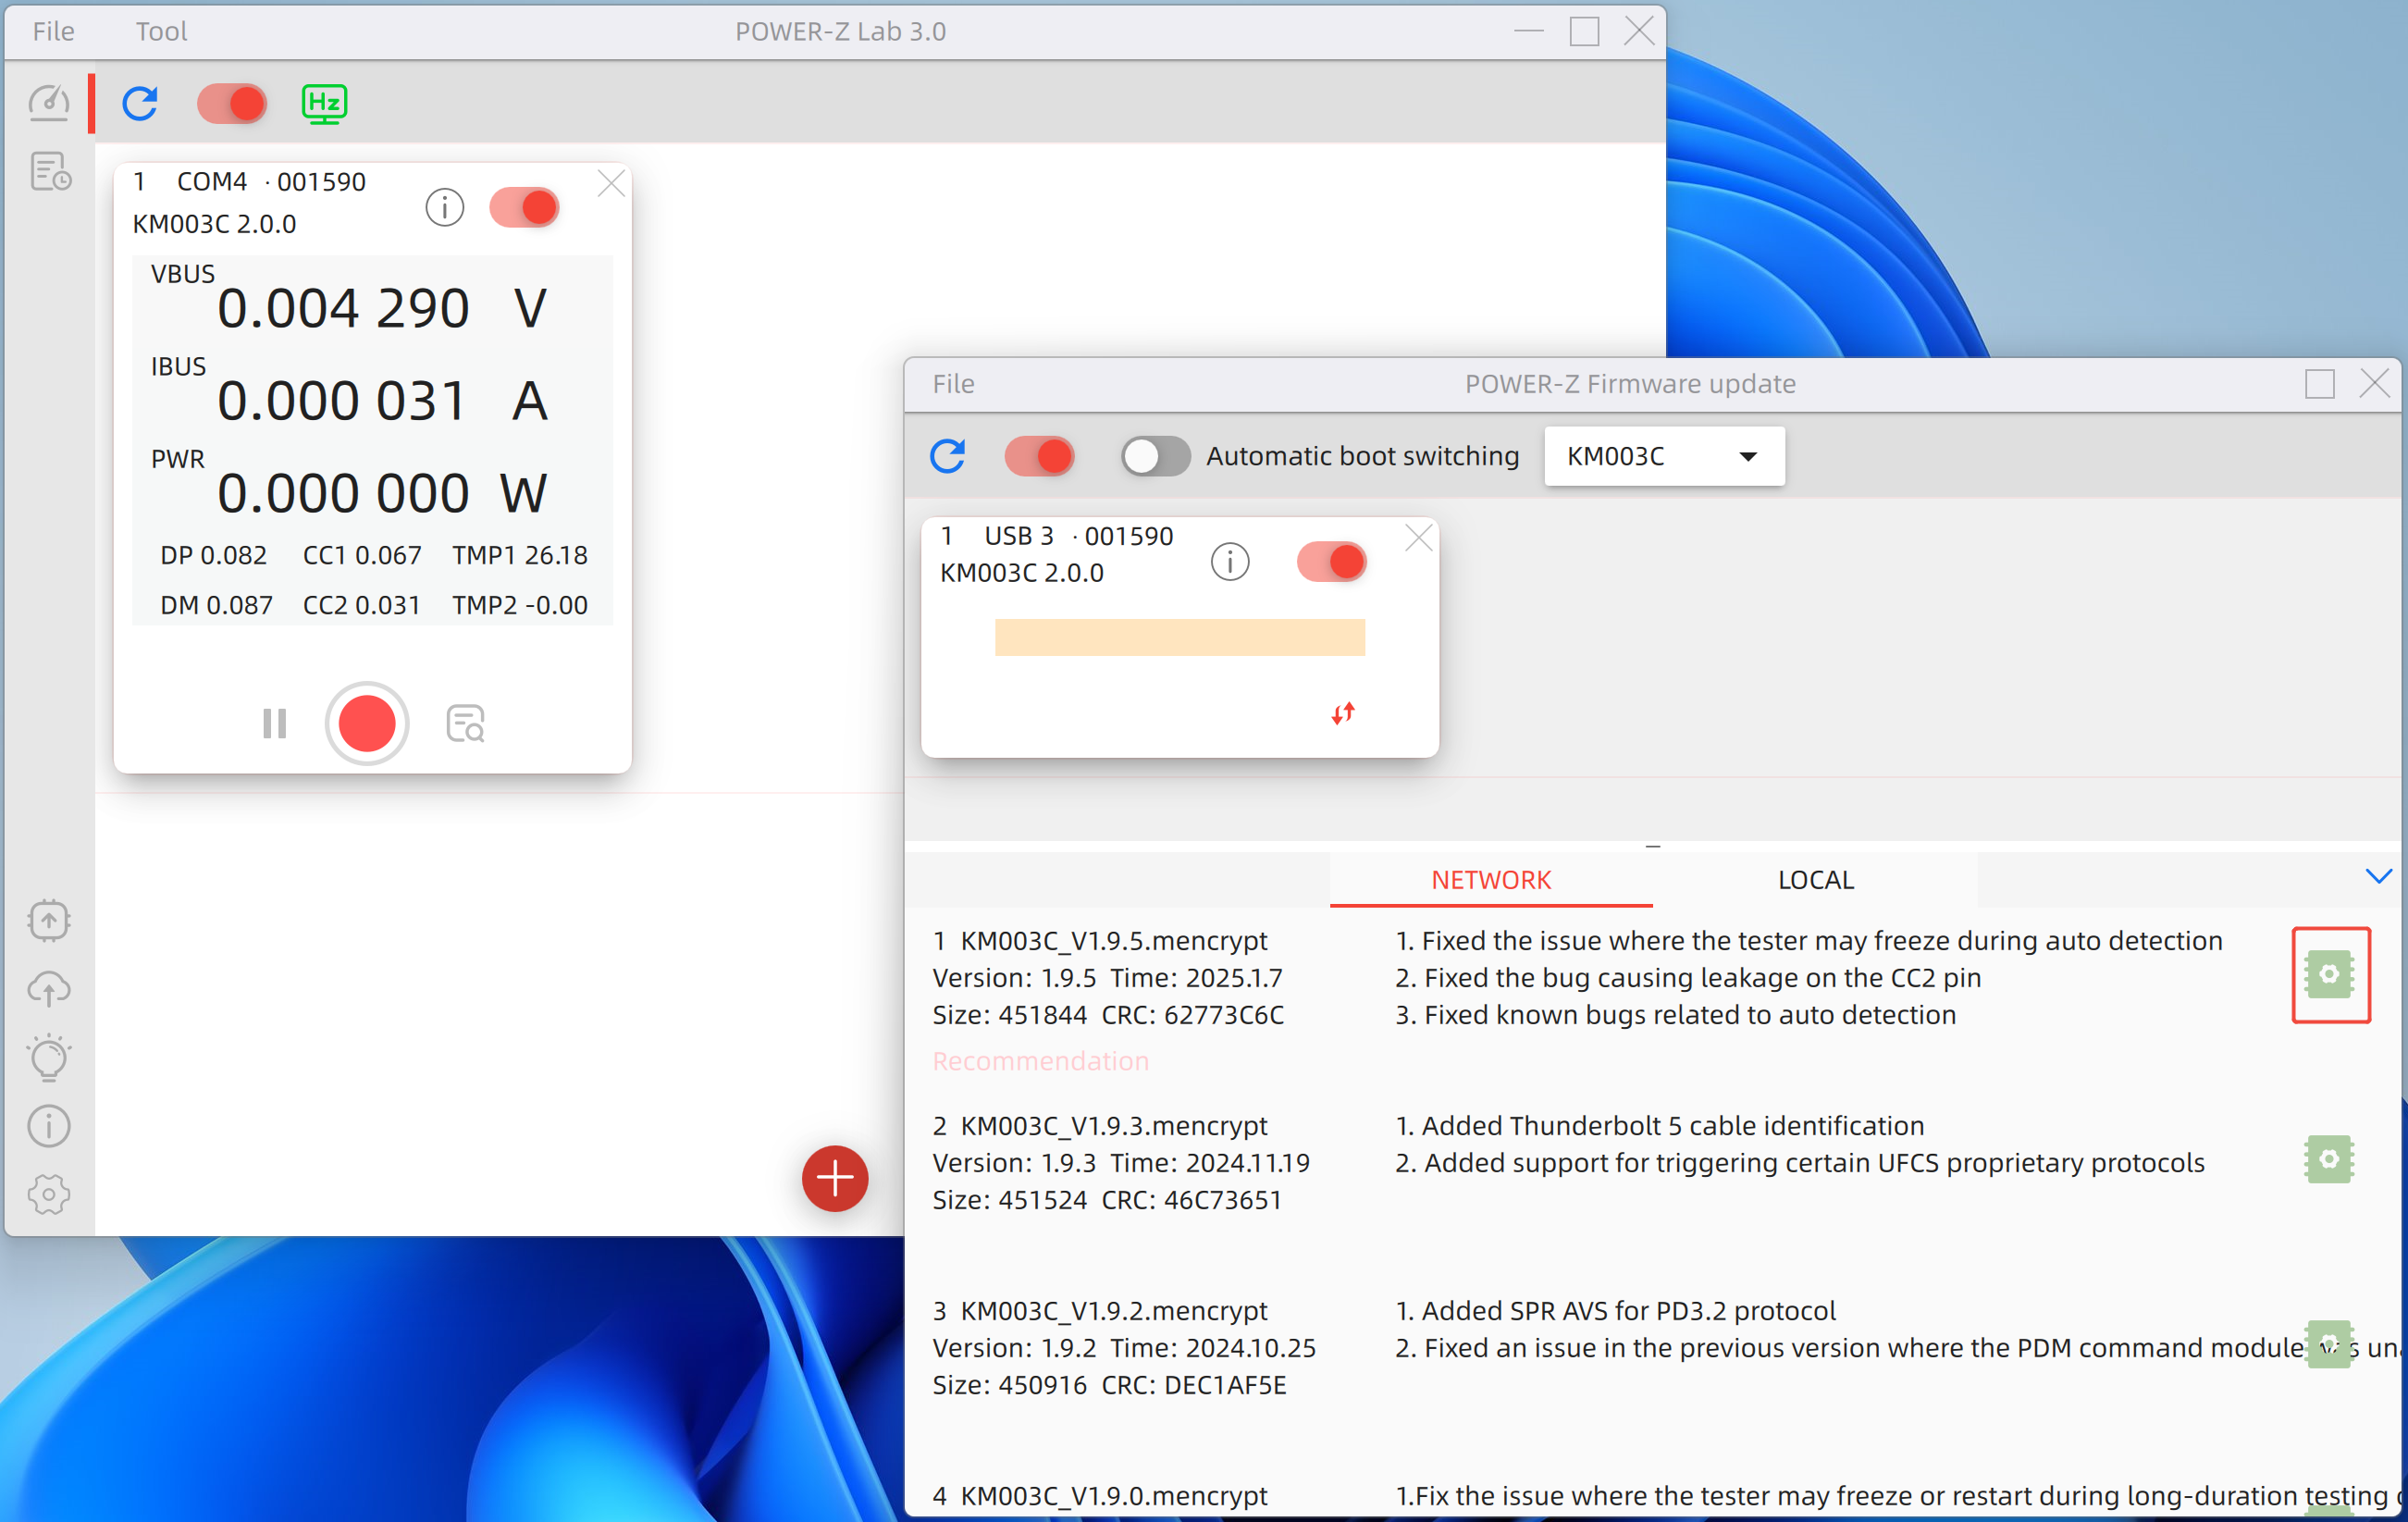
- Follow the "2. Device Connection" section to access the firmware upgrade interface.
- Select Network instead of Local.
- Choose the latest firmware from the official release.
- Click the chip icon on the right and wait for the process to complete.
- Once the downgrade is finished, a "Completed" message will appear.
This will restore the E-Marker reading function.
These known major bugs will be fixed in a future update—stay tuned!
Summary of ChargerLAB
In summary, POWER-Z Lab V3.0 was primarily developed to bring Mac support while also catering to users who require multi-tester, multi-device simultaneous testing. If you do not fall into these categories, we strongly recommend using the more stable and feature-complete V2.4.0 PC version instead.
As this version continues to evolve, we welcome you to follow ChargerLAB for updates and further improvements!
Related Articles:
1. Inventory of 10 Commonly Used Functions of Power-Z KM003C
2. ChargerLAB POWER-Z Tester Now Available on Amazon.de, UK & FR –A Must-Have Tool for Charging Enthusiasts!
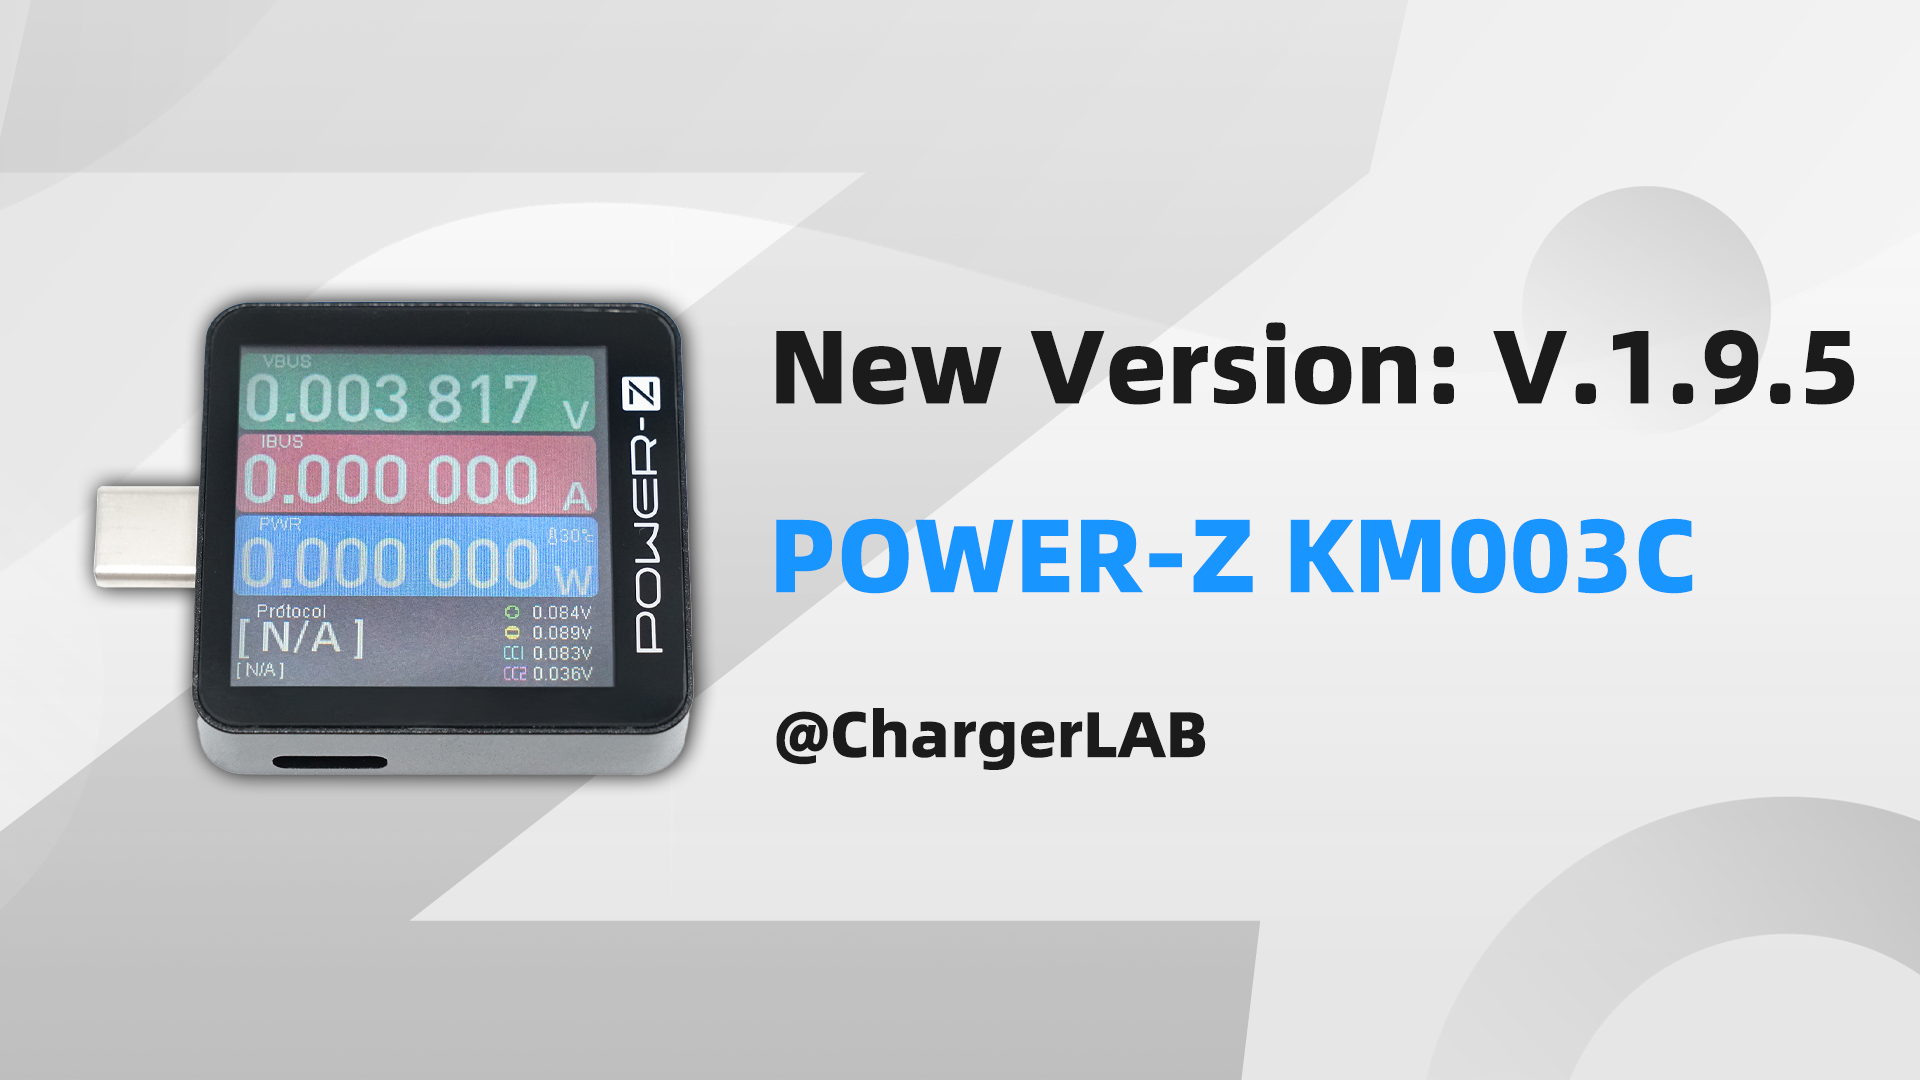
3. V1.9.0 | The New Software Version of POWER-Z KM003C